Title here
Summary here
Under Organization Settings, users can see the name of their organization and also update the name of their organization.
To edit the organization name, first type in the new name
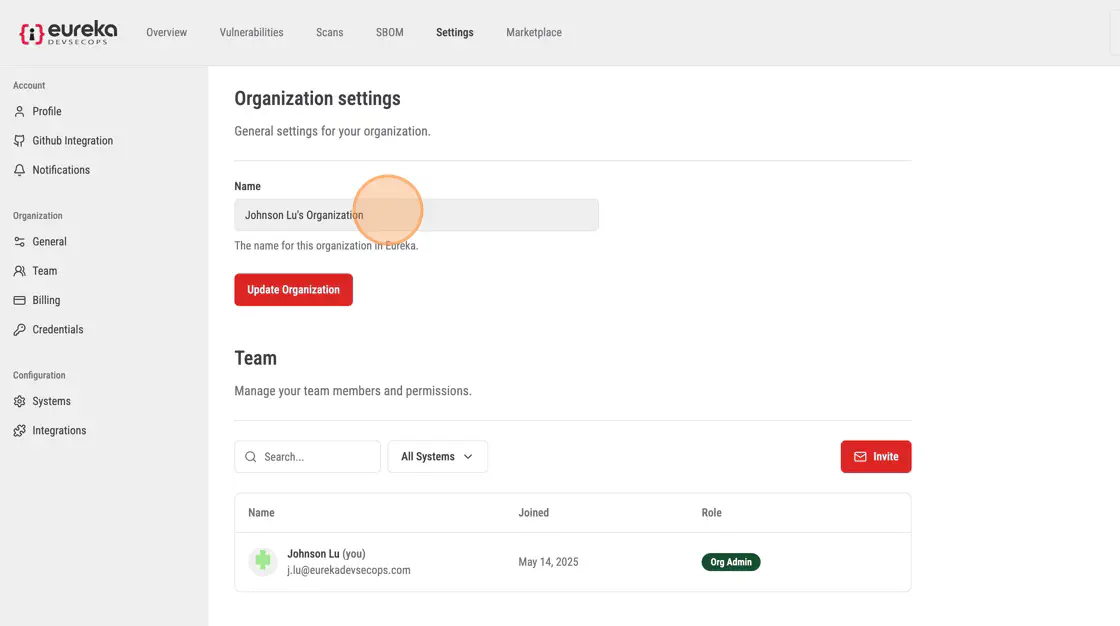
Then click Update Organization to save and confirm the new organization name

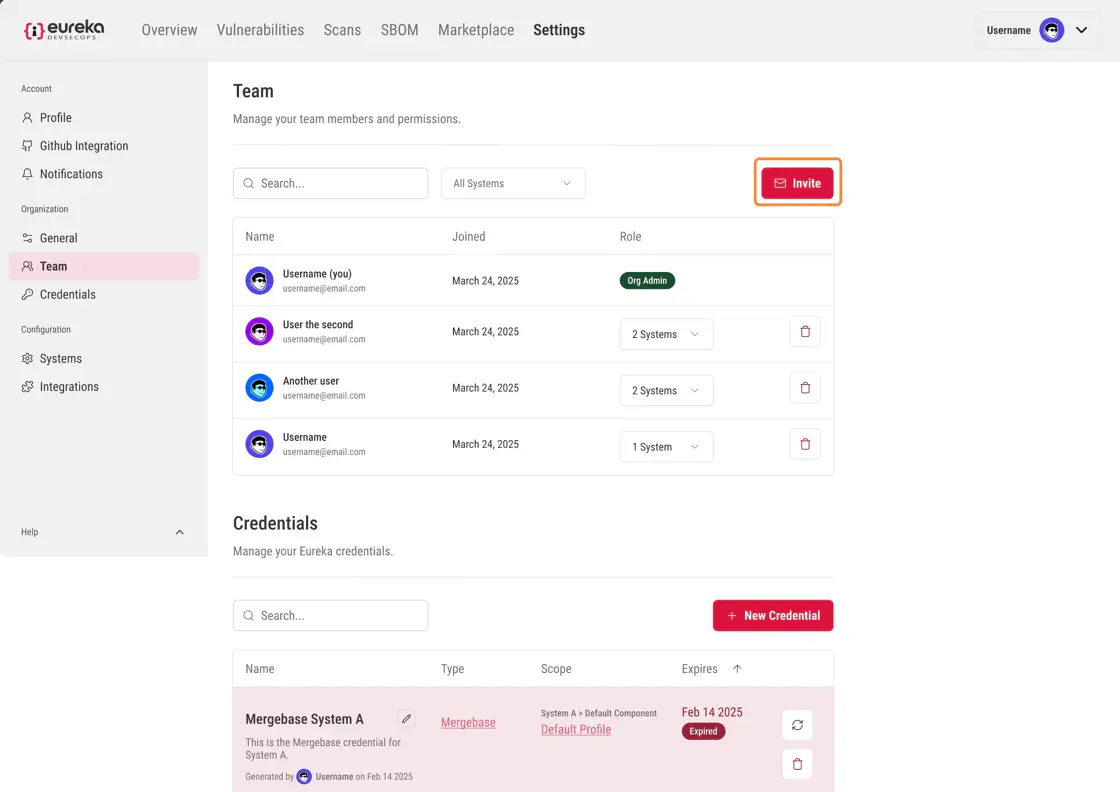
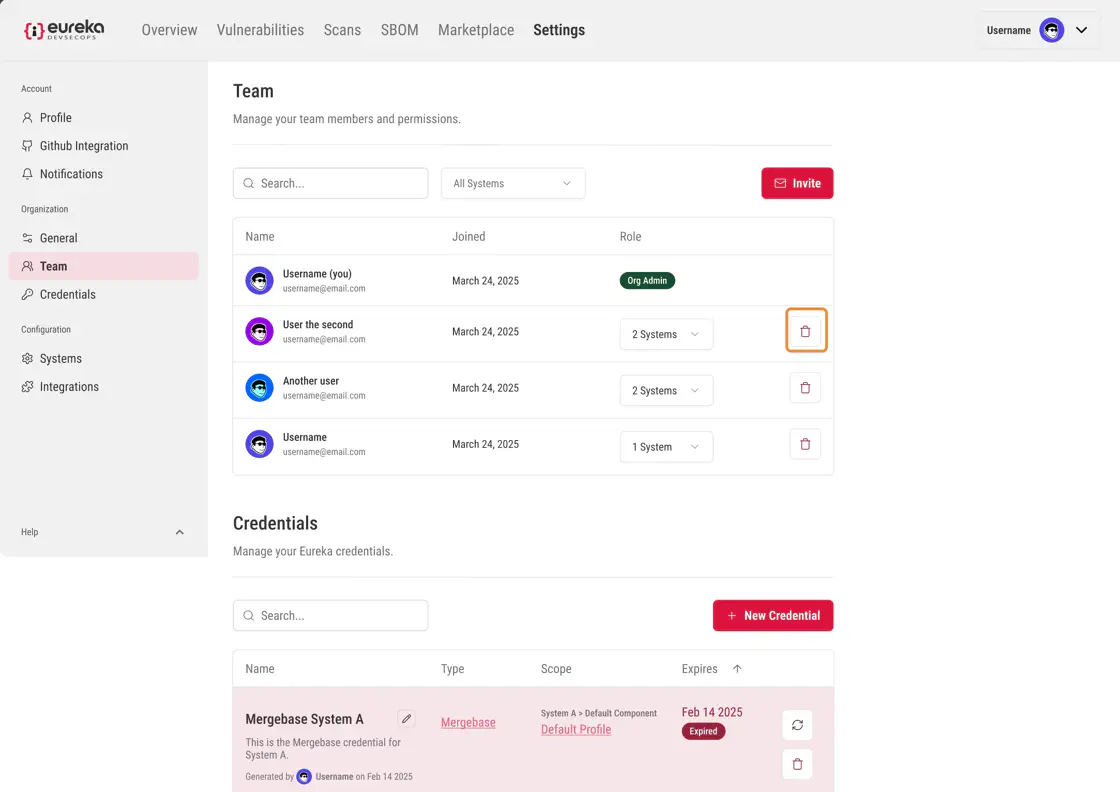
In this section, you can view and manage members of your organization including their role.
Follow these steps to invite members to your team:
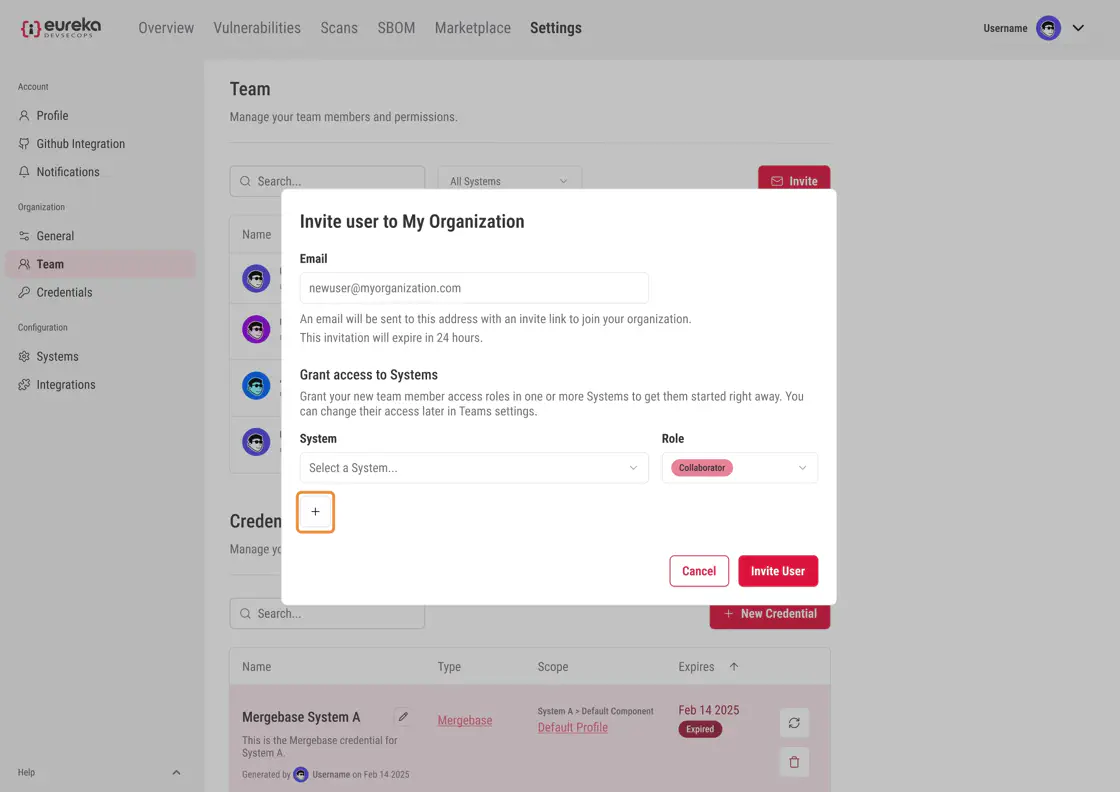
Click the Invite button located at the top-right corner of the page.
In the pop-up menu, enter the email address of the individual you want to invite.
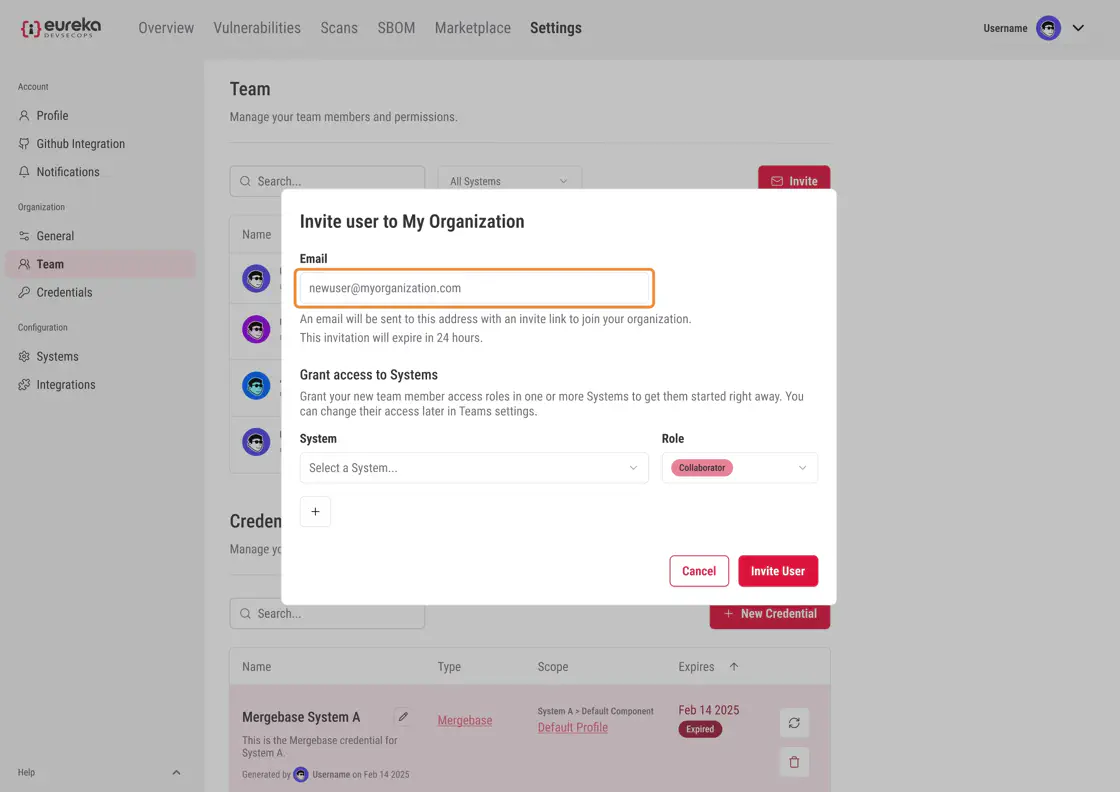
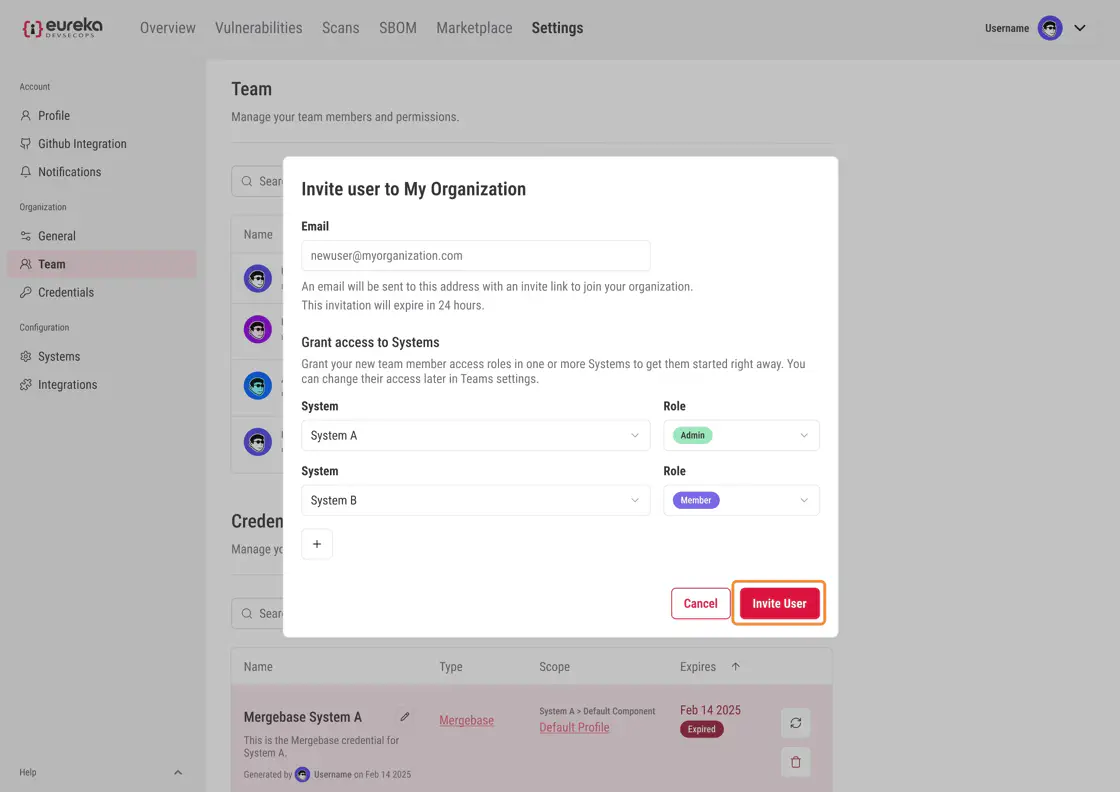
Select the systems you want to grant them access to and assign their role for each system.
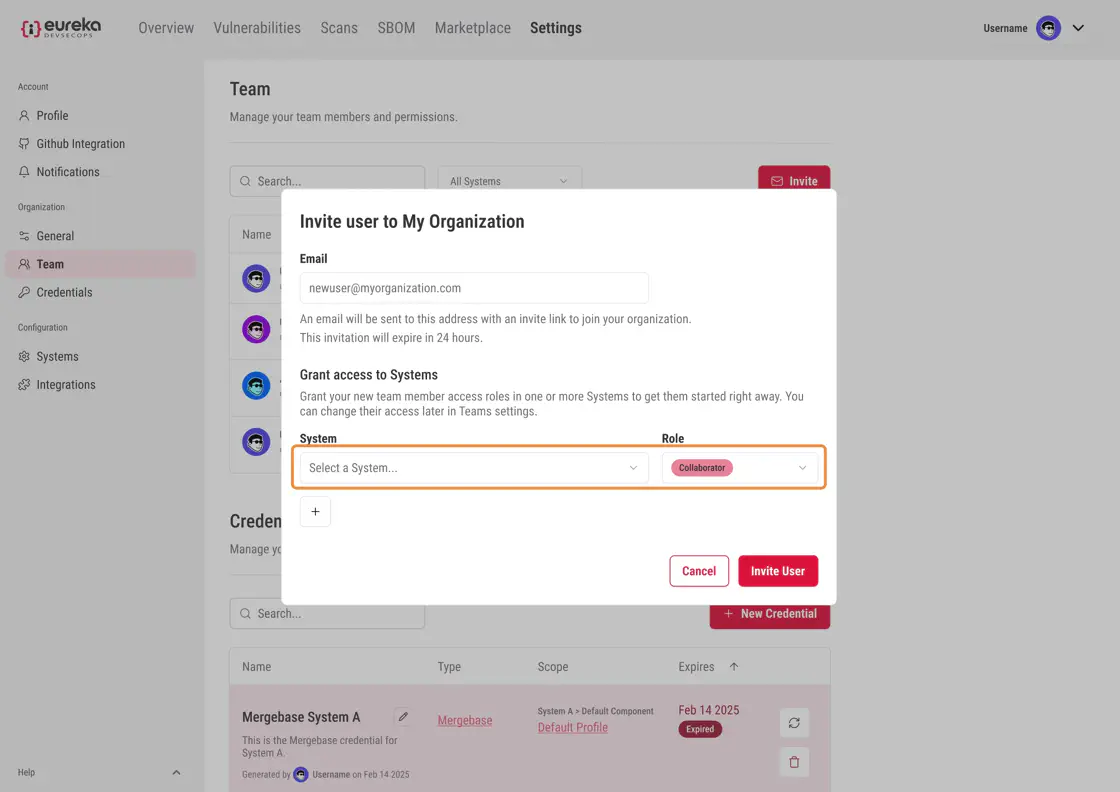
To add access to more systems, click the + button. Then, select additional systems and assign roles for those systems.
Once you’ve configured the invite, click Invite User to send the invitation.
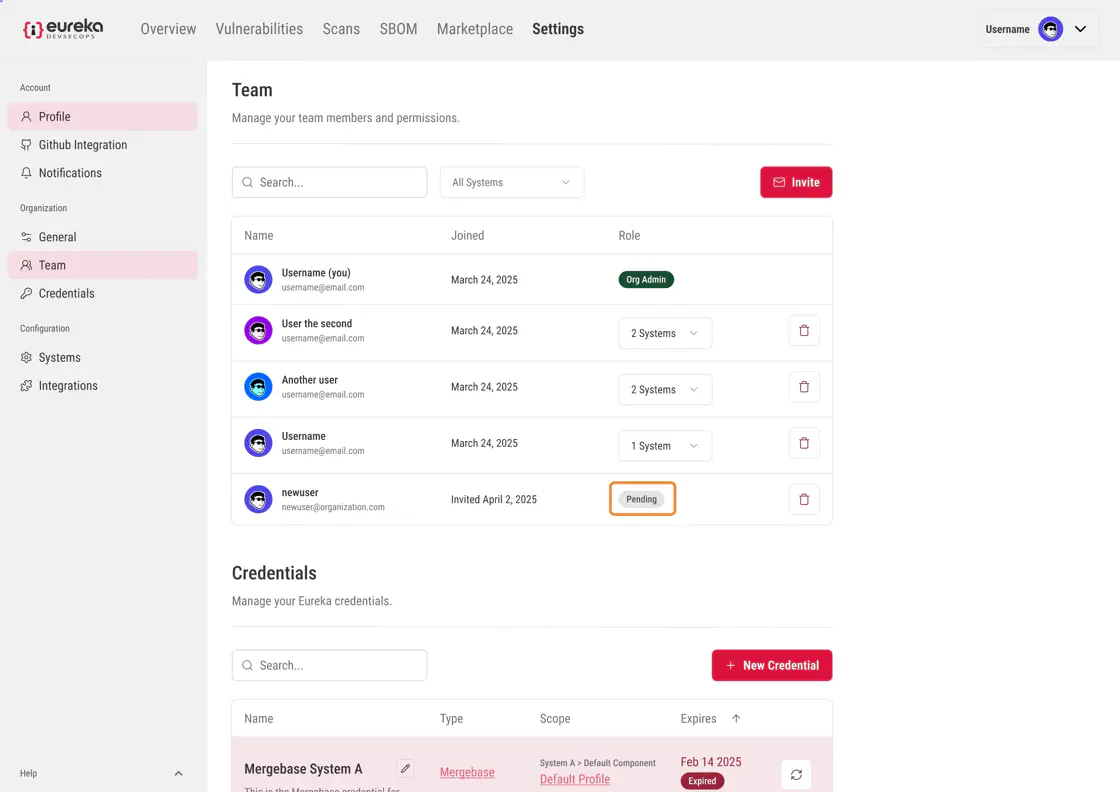
After sending the invite, the individual’s name will appear in the list with a status of Pending.
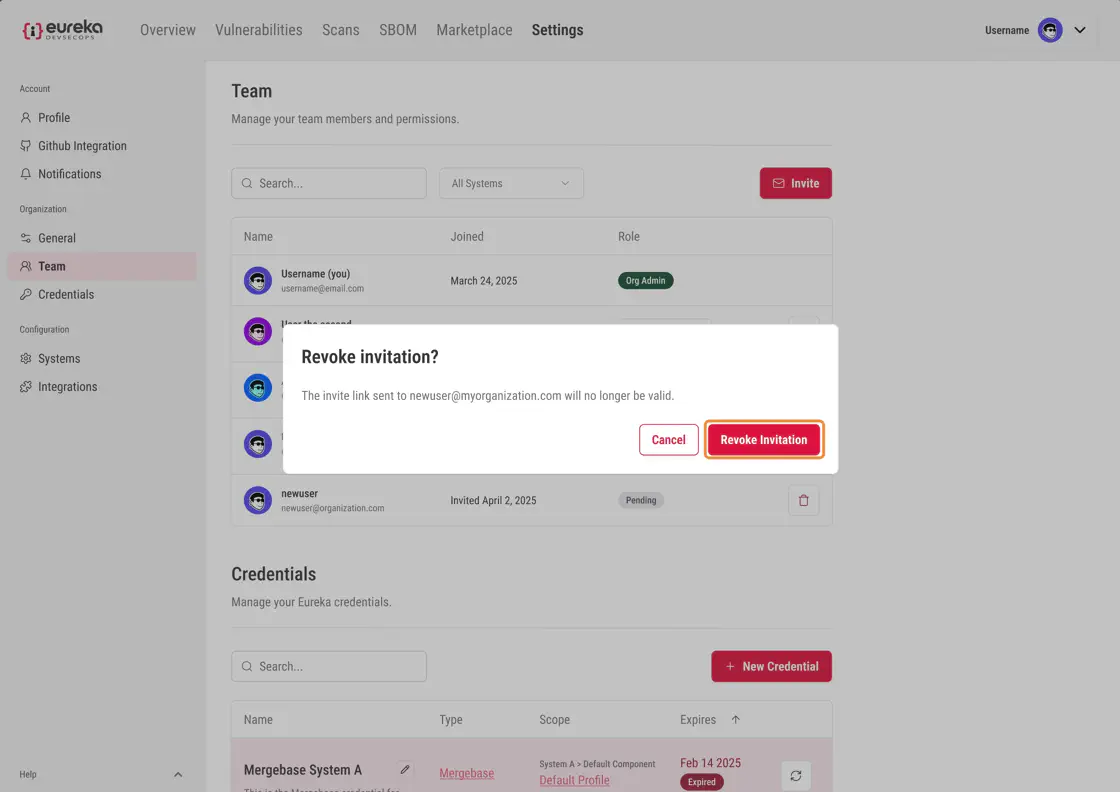
If you need to revoke the invitation, click the delete icon next to their name.
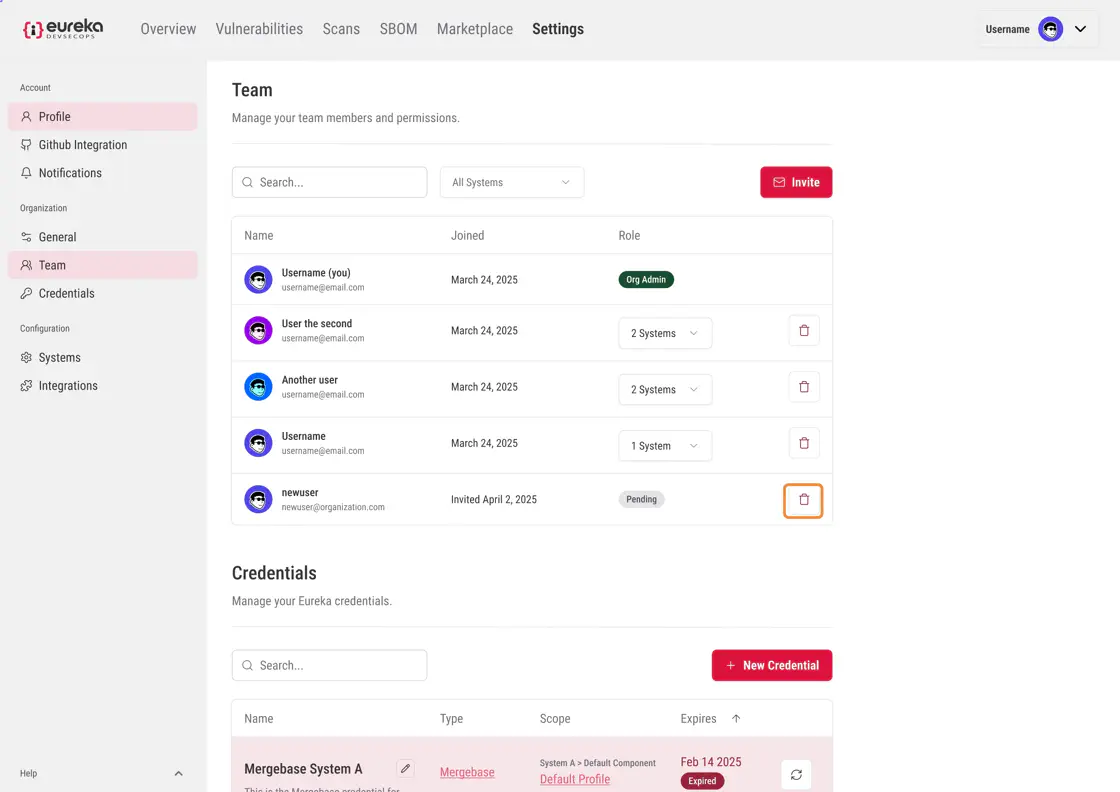
Confirm the action by clicking Revoke Invitation in the confirmation dialog.
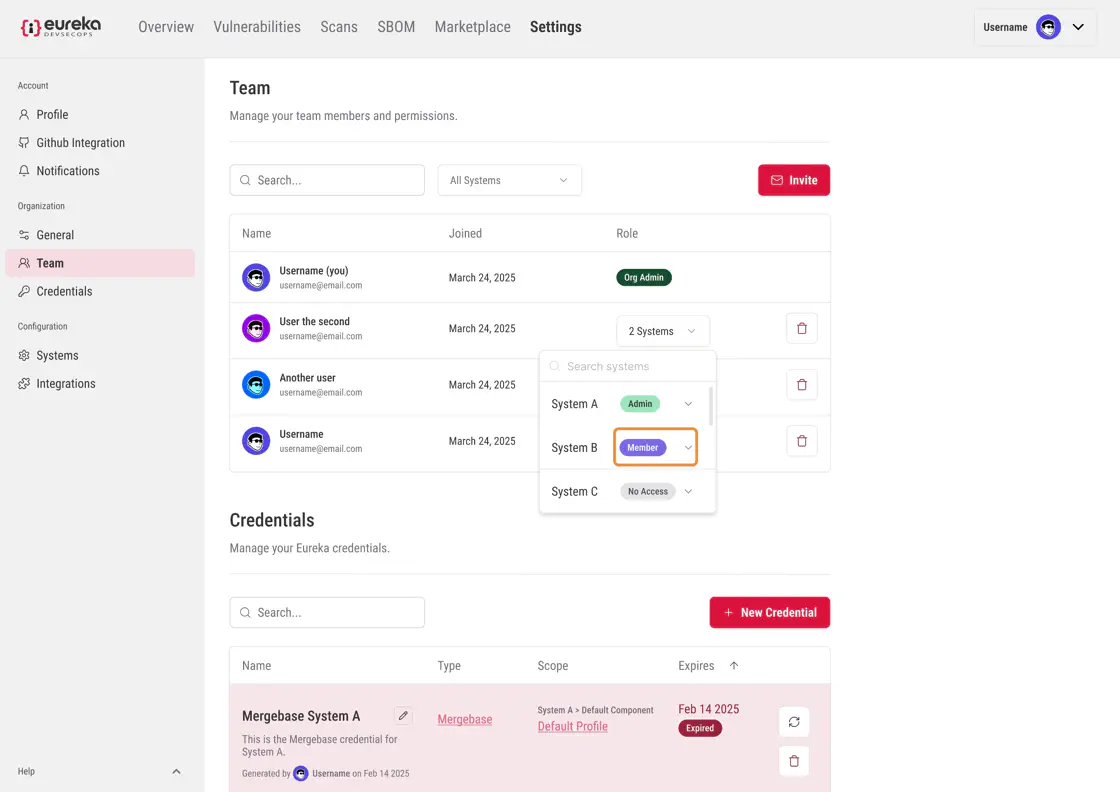
To update member roles, first click on the dropdown menu in the roles column
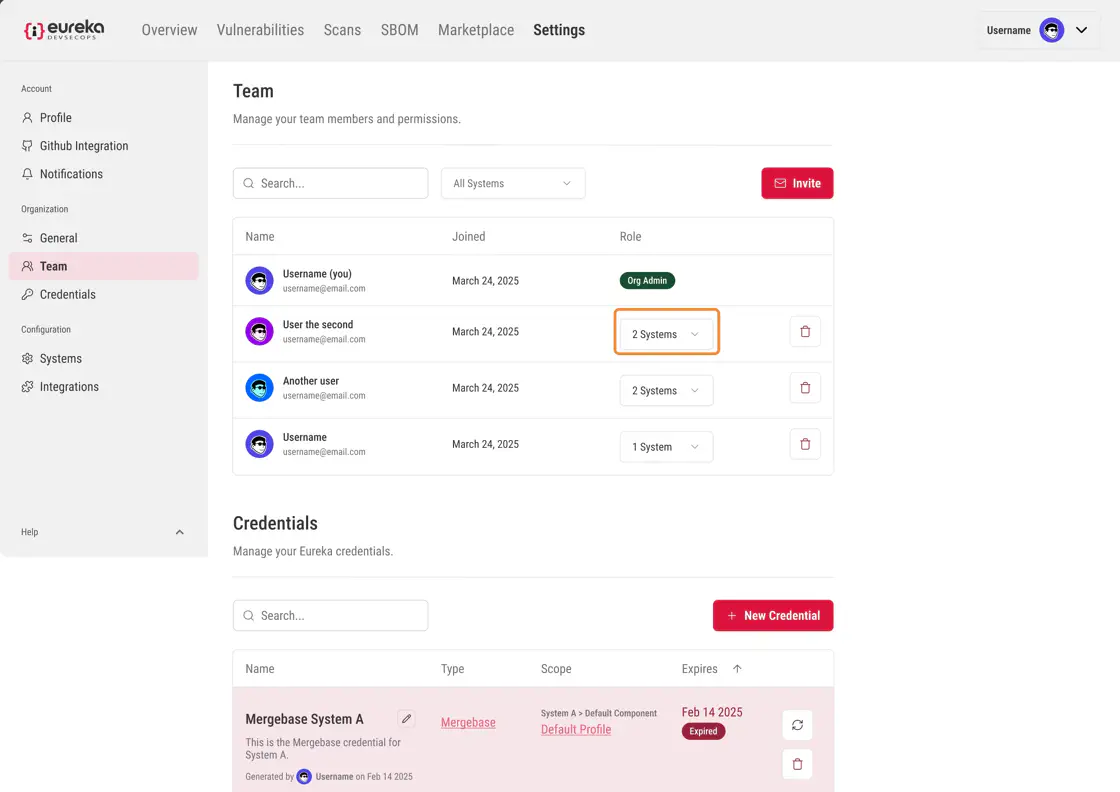
Then click on the dropdown menu next to the system that you want to update their role for
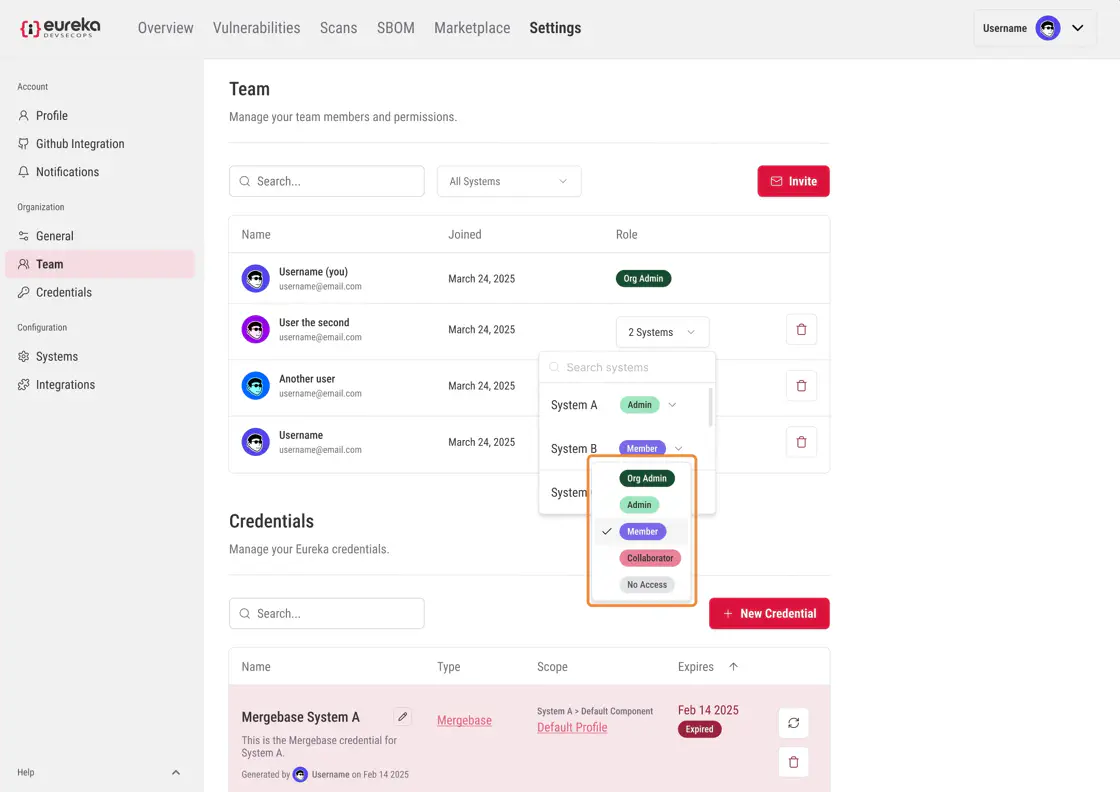
The roles which exist are as follows
Org Admin: has all rights, primarily to create systems
System Admin: all rights within a system, primarily can add users to the system
Member: read/write access to system
Collaborator: read only access
Select the new role you want the member to have for the system
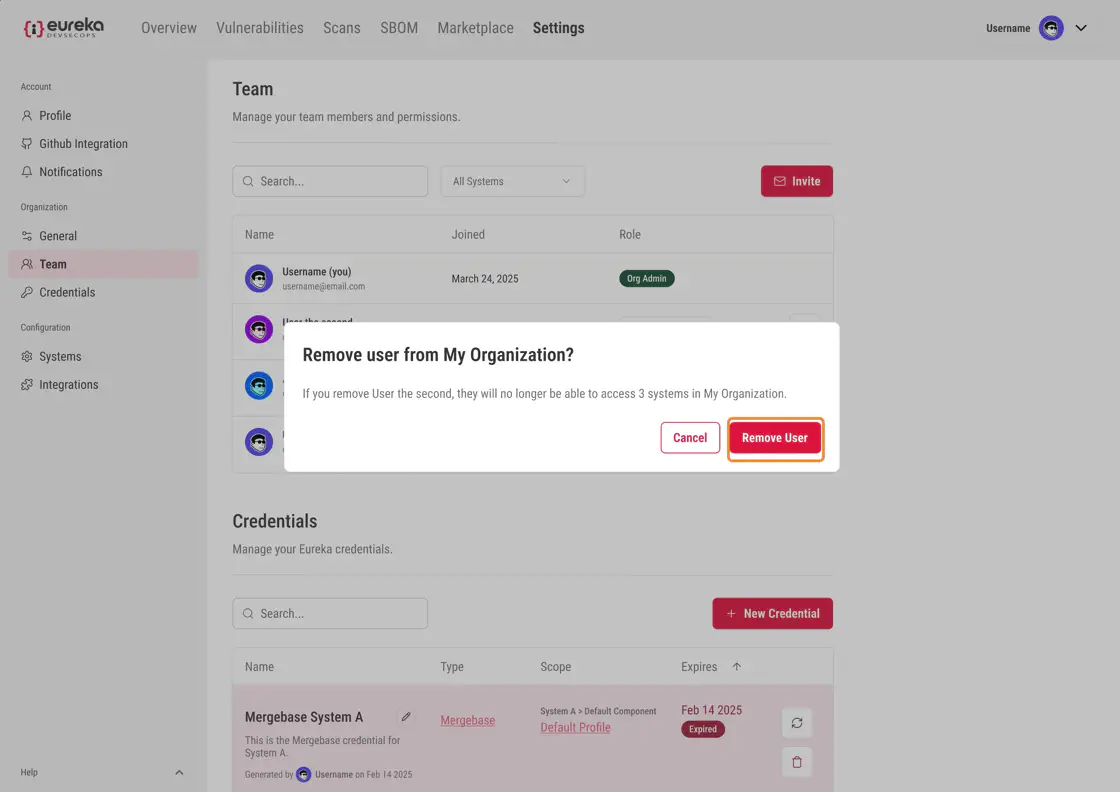
To remove members, click on the delete icon on the right of the member you would like to remove
To confirm, click Remove User
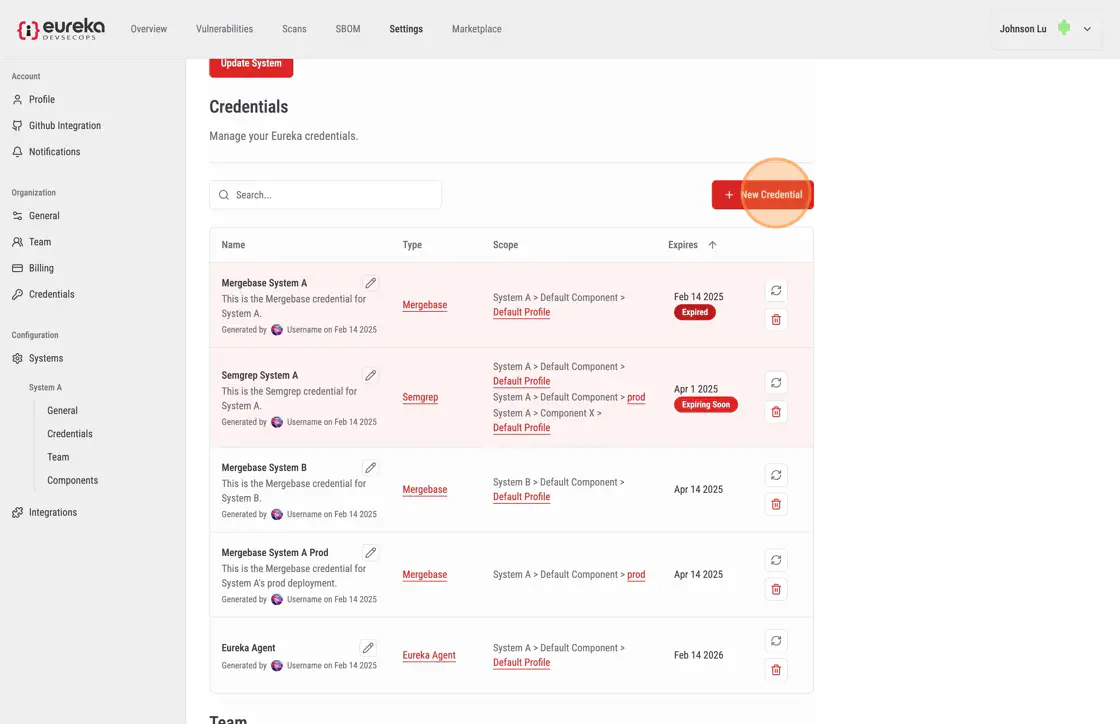
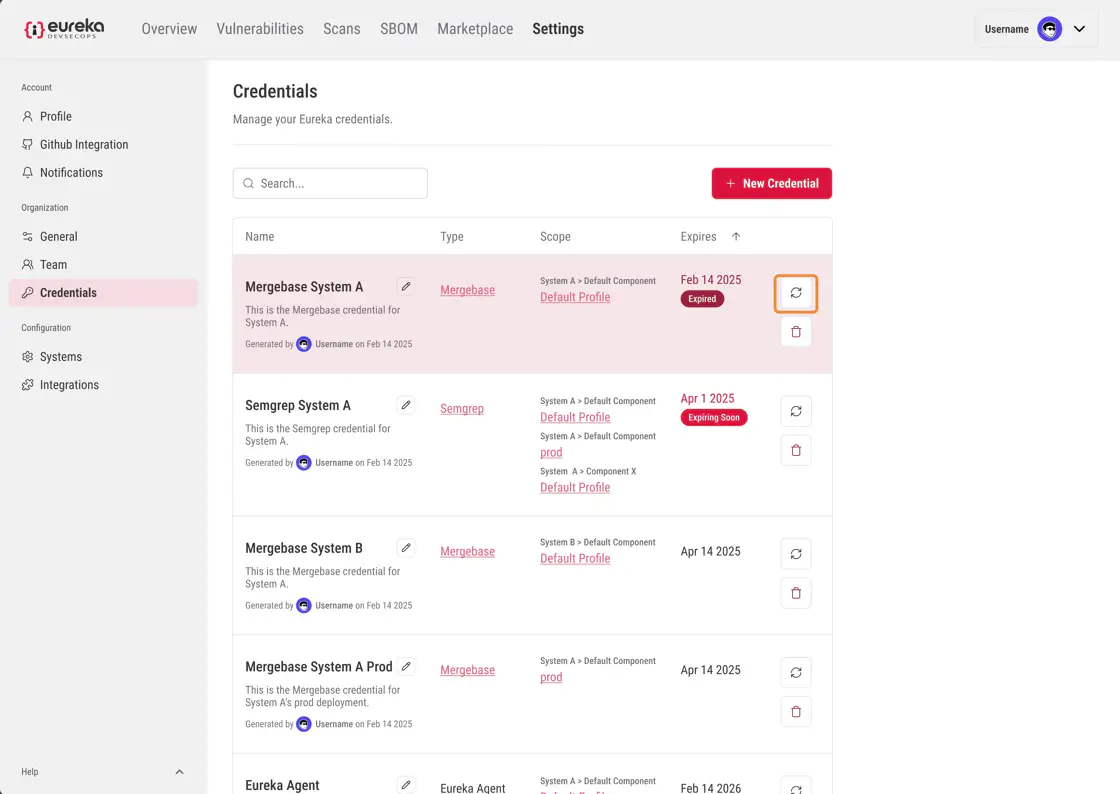
The Credentials section allows you to view, add, edit, refresh, and manage your credentials. You can also see which profiles the credentials are connected to and their expiration dates.
The currently supported credential is the EUREKA_ENDPOINT value.
By following these guidelines, you can effectively manage your credentials and maintain seamless integration with your CI/CD pipelines.
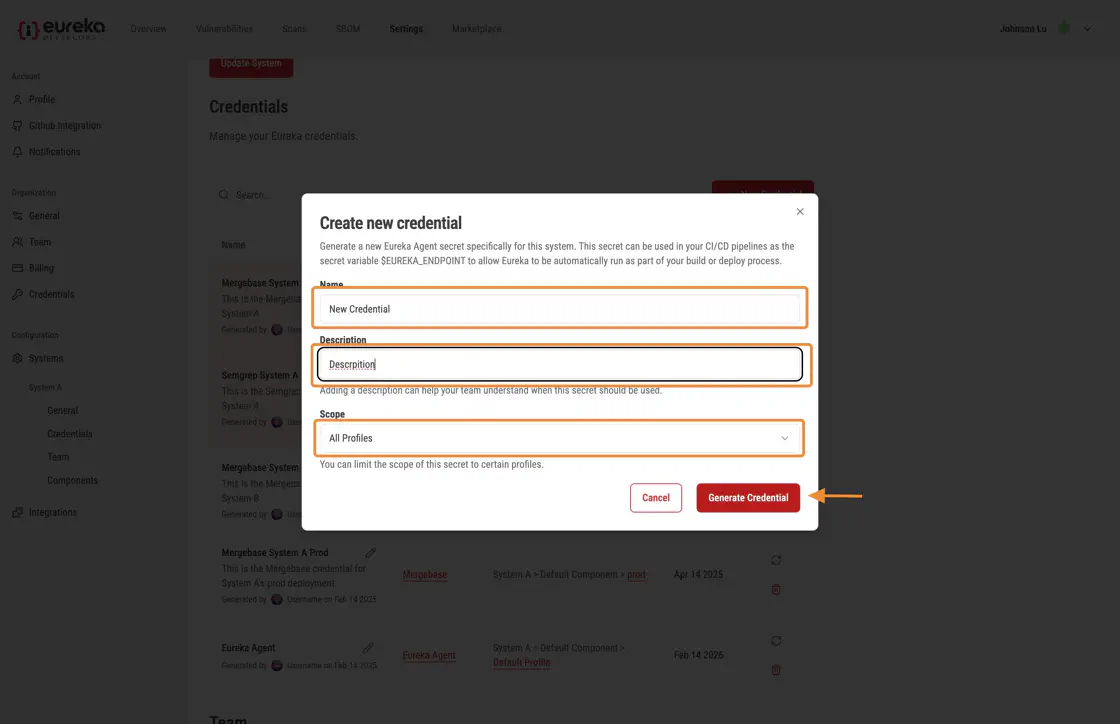
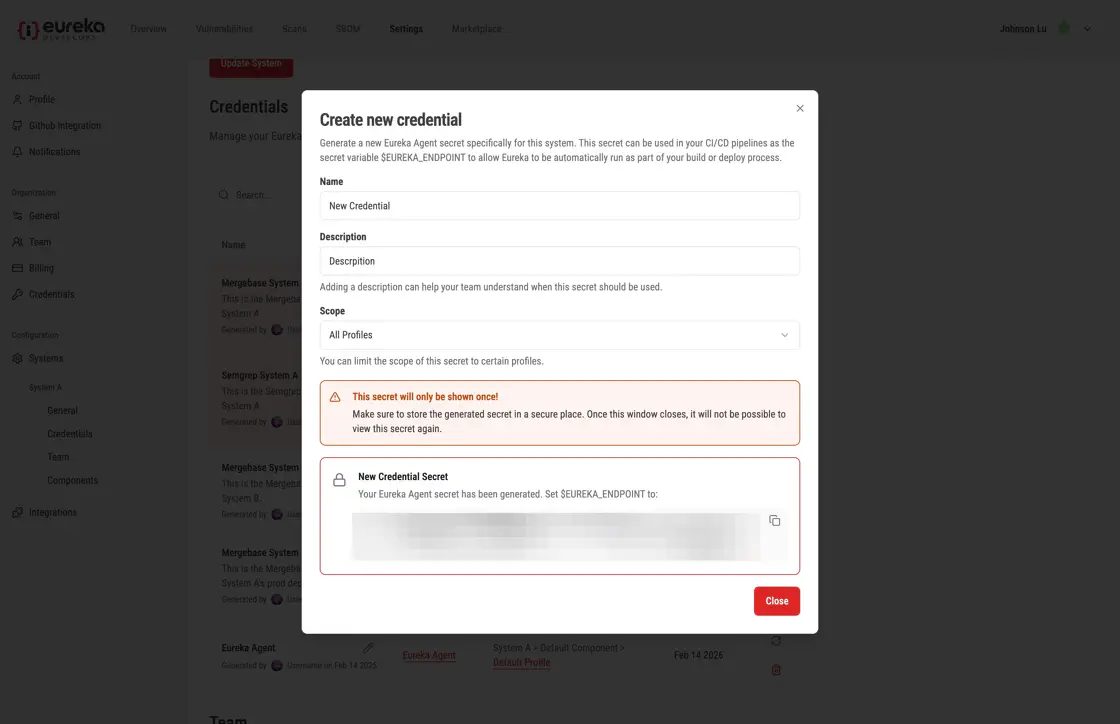
To add new credentials, click the New Credential button
Then fill in the fields for your new credential
You will then see new credentials will generated
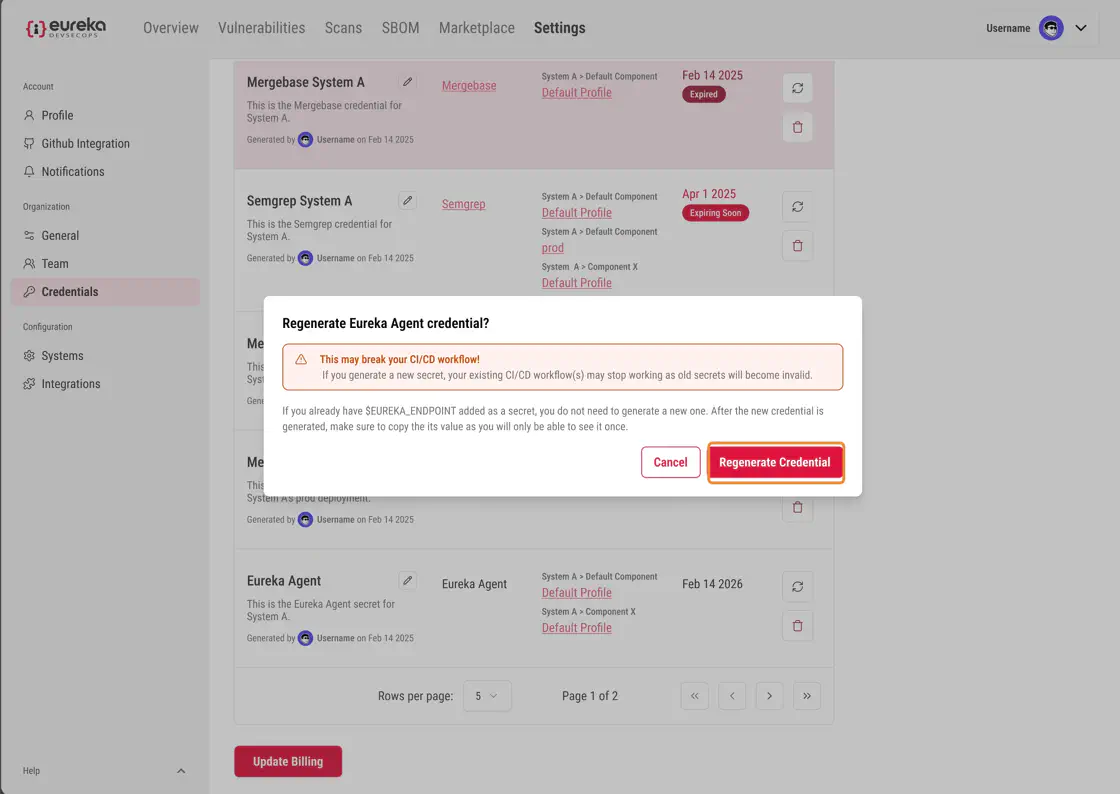
To refresh an existing credential, click the refresh icon next to the credential which you want to refresh
In the popup, click Regenerate Credential to confirm the action. Do note that when you regenerate secrets, that your old credentials will become invalid. Once refreshed, the credentials will last for 6 months before expiring.
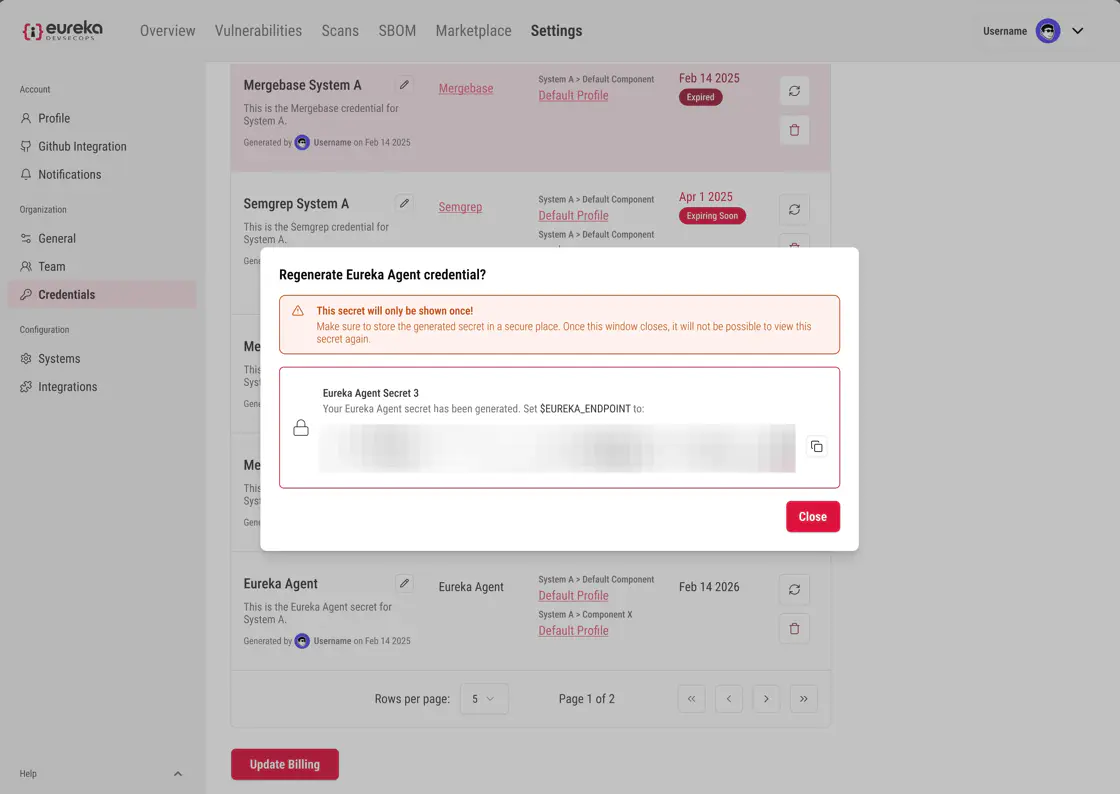
Afterwards, you will see a new secret generated in the popup.
To delete an existing credential, click the delete icon next to the credential you want to remove
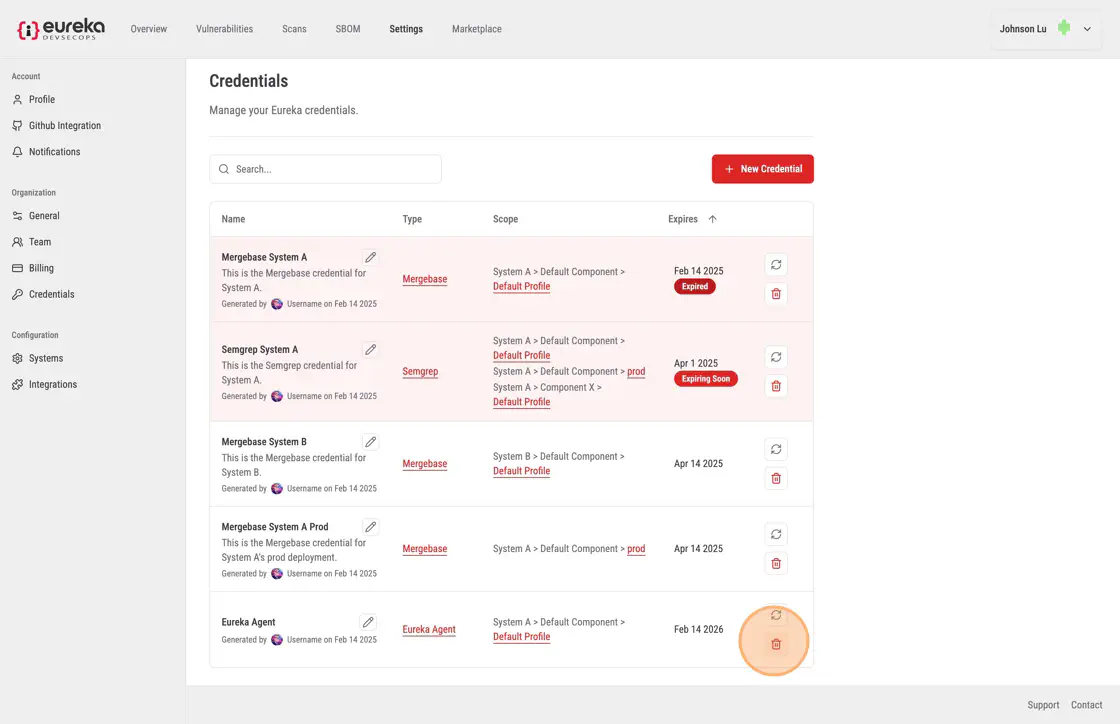
To confirm, click Delete Credential in the popup menu cred
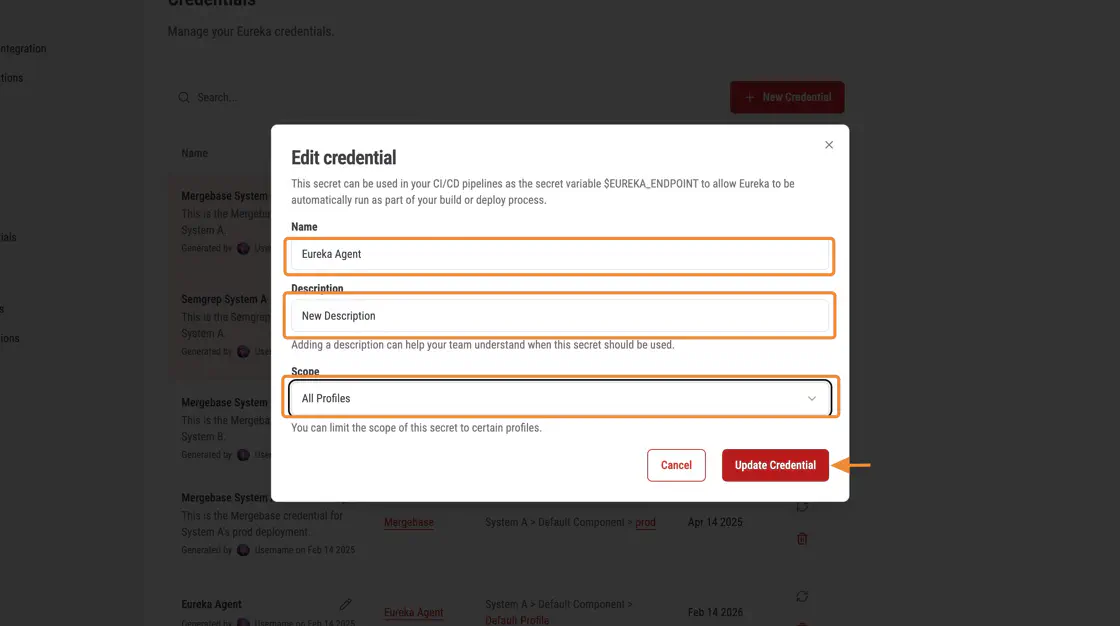
To edit the information about the credential, click the edit icon for the credential you want to update

In this menu, you can modify the Name, Description, and the Profile that the credential is linked to. Then, click Update Credentials to confirm