Title here
Summary here
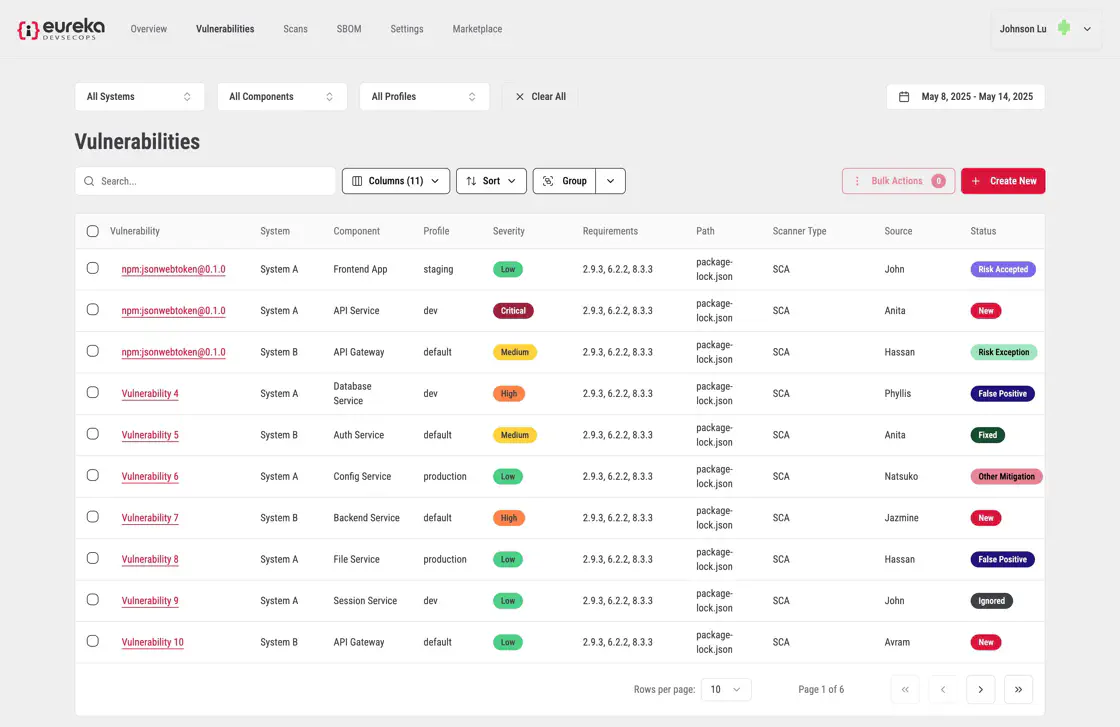
After running a scan, you can view and review the vulnerabilities that were detected in your application.
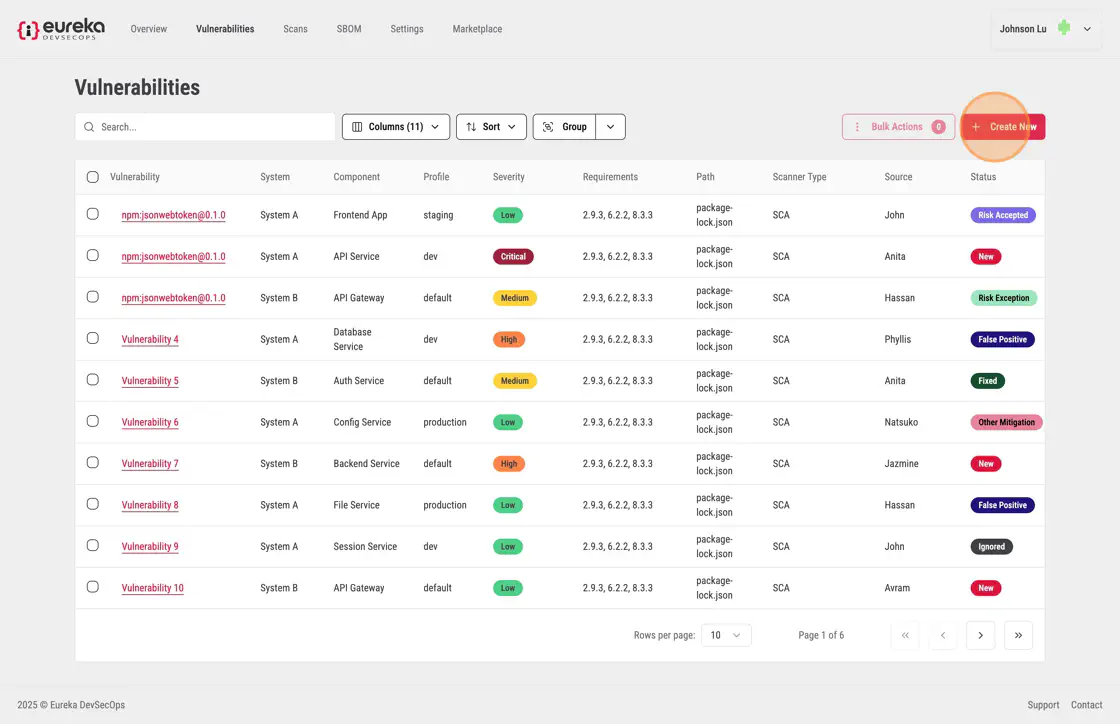
Click on Vulnerabilities in the left menu bar to view a list of all vulnerabilities that have been found in an application system.
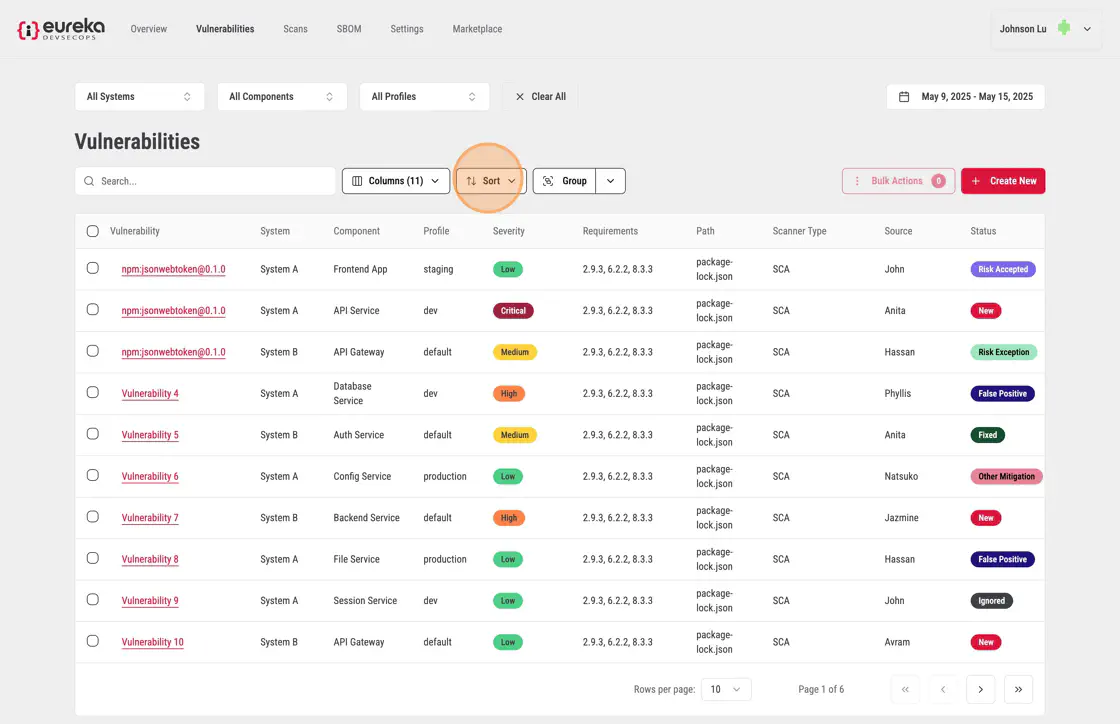
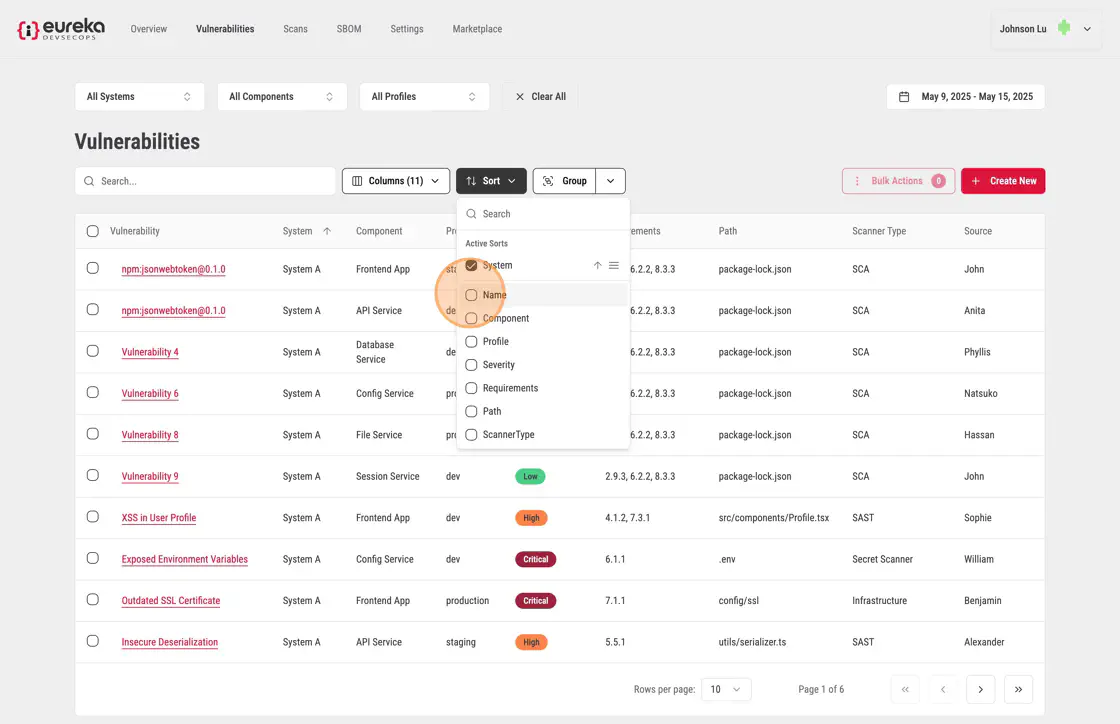
Eureka offers a way for you to sort your vulnerabilities through a multiple columns system.
Click Sort to open the drop-down menu.
Choose the column you want to sort by from the list.
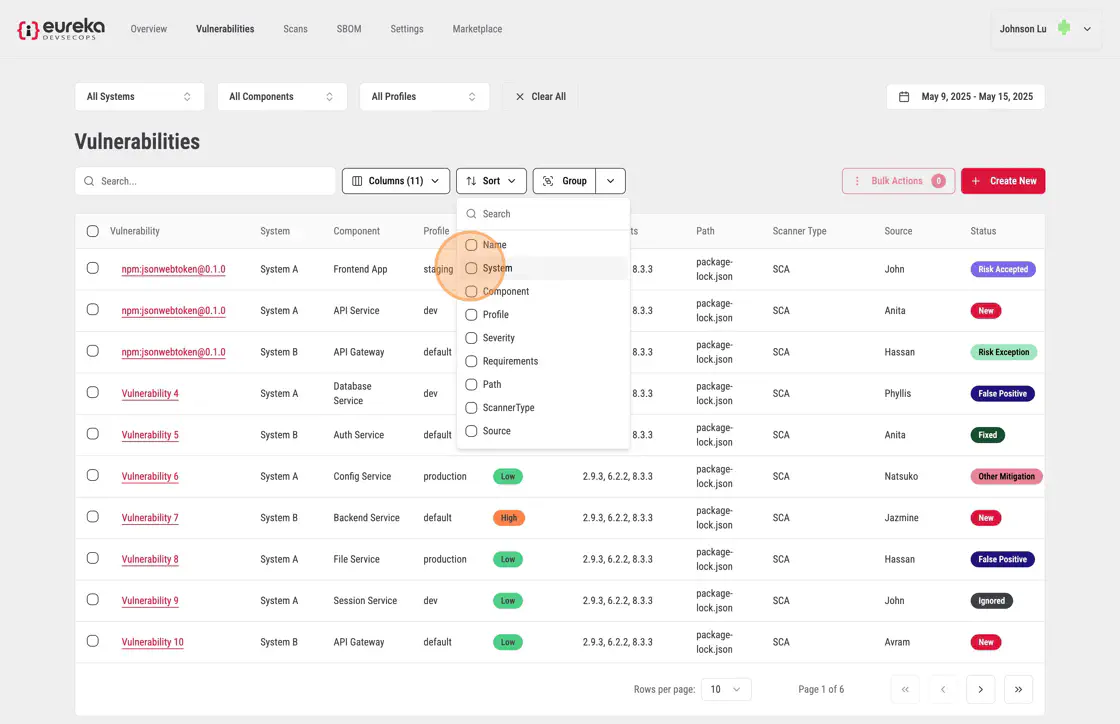
The table will automatically update, organizing the rows based on your selection.
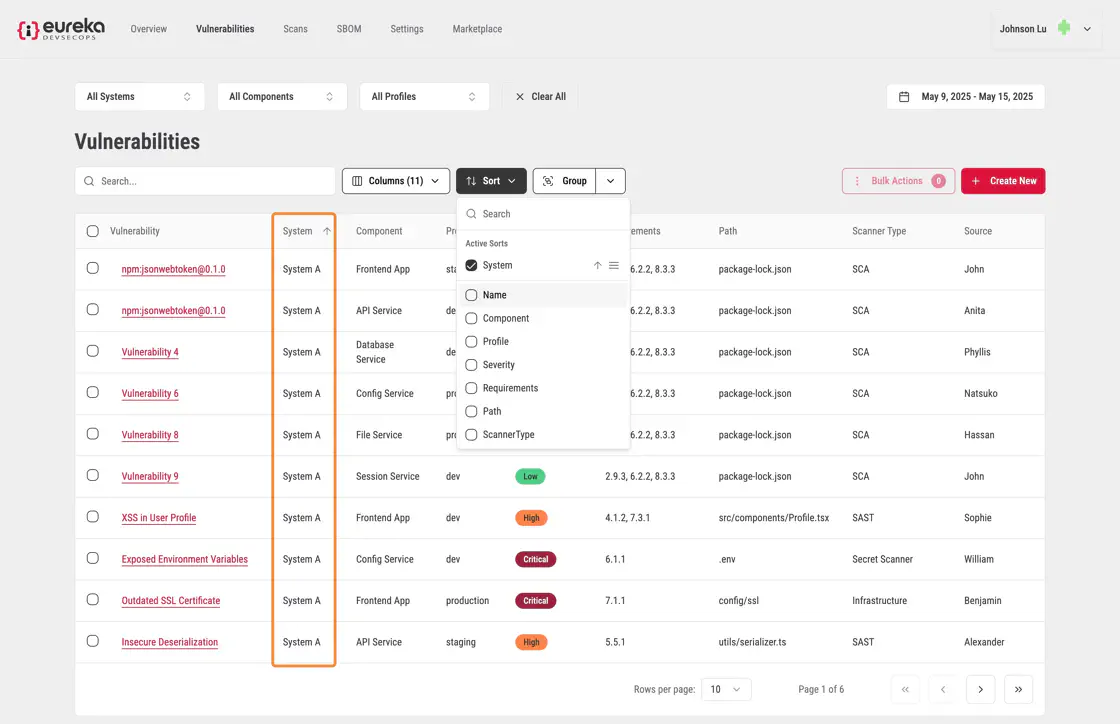
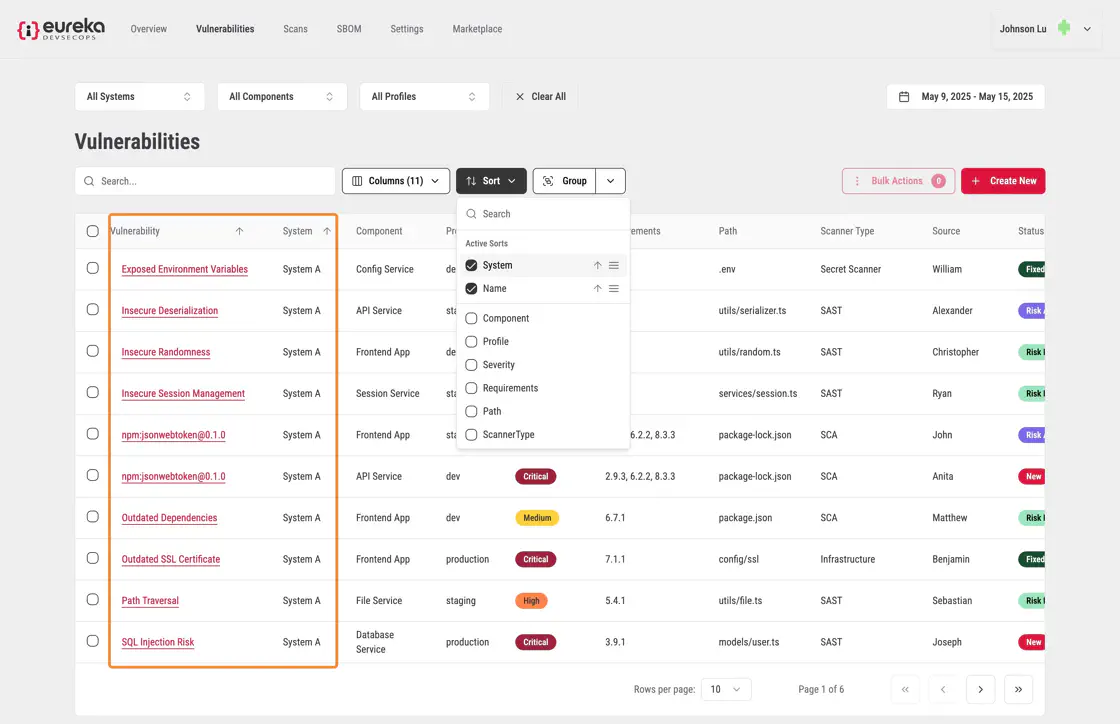
To apply a secondary sort, select another column from the drop-down menu.
The table will refresh again, sorting the rows by the second column while maintaining the previous sort order.
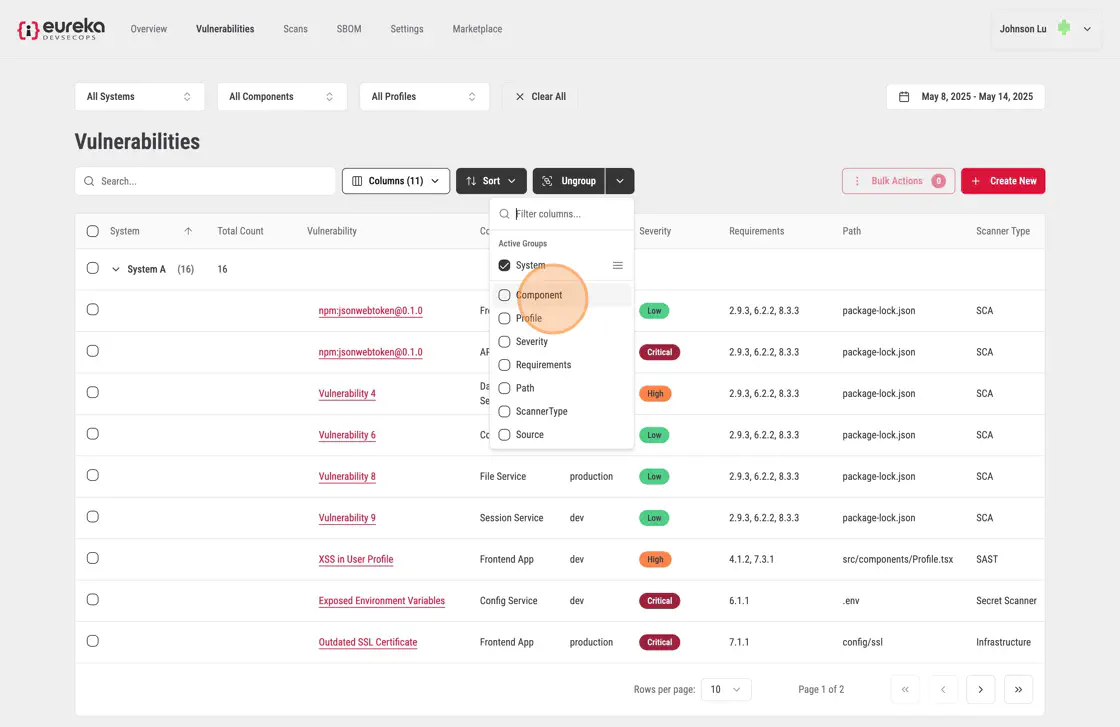
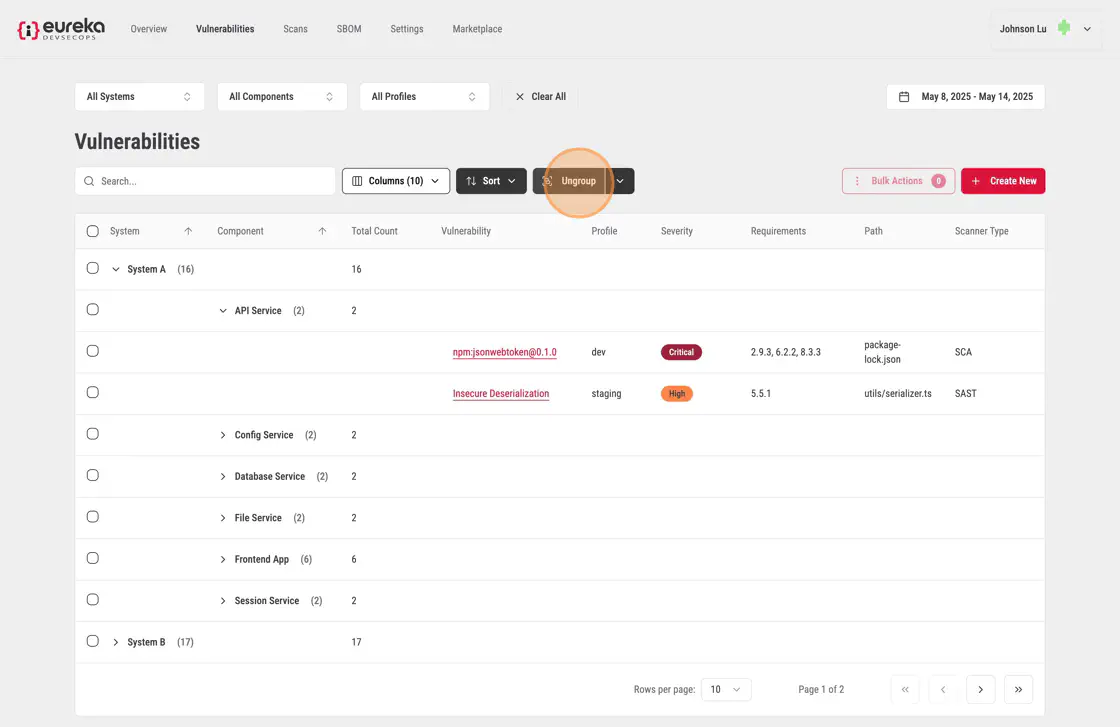
You can group their vulnerabilities through hierarchical grouping. You can click on a column value to group the table by that category. When a second value from another column is clicked, the table further sub-groups the existing groups using the second category.
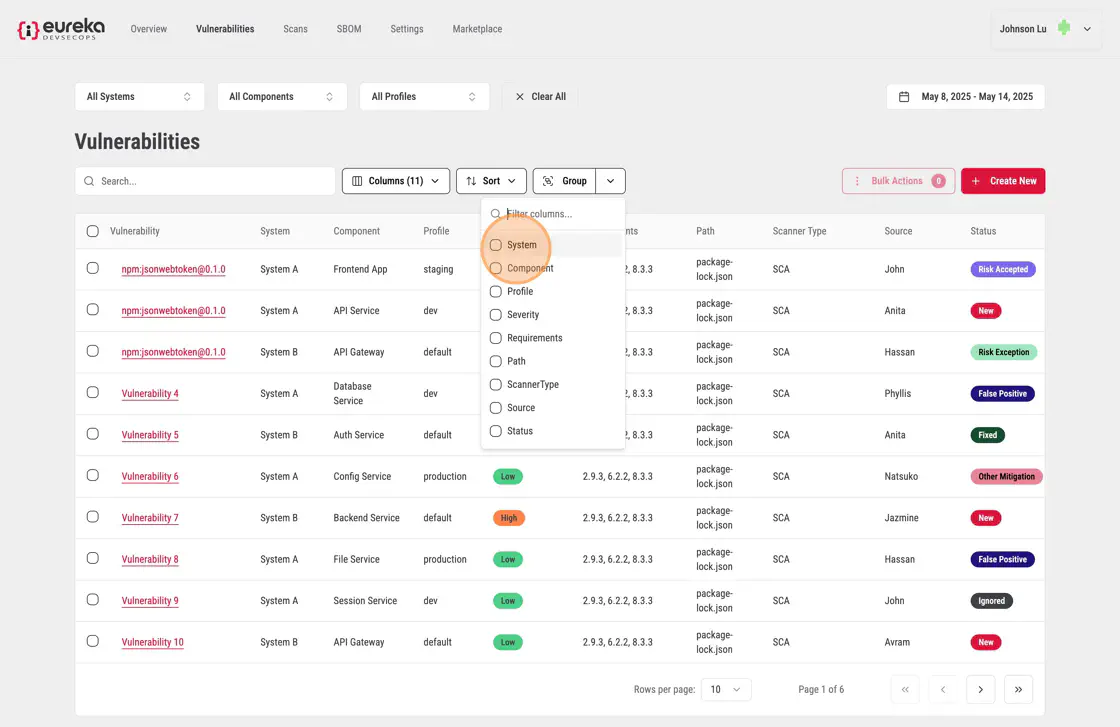
To group vulnerabilities, you must first click the Group dropdown menu at the top of the Vulnerabilities table.

You can then select a category to group the vulnerabilities by
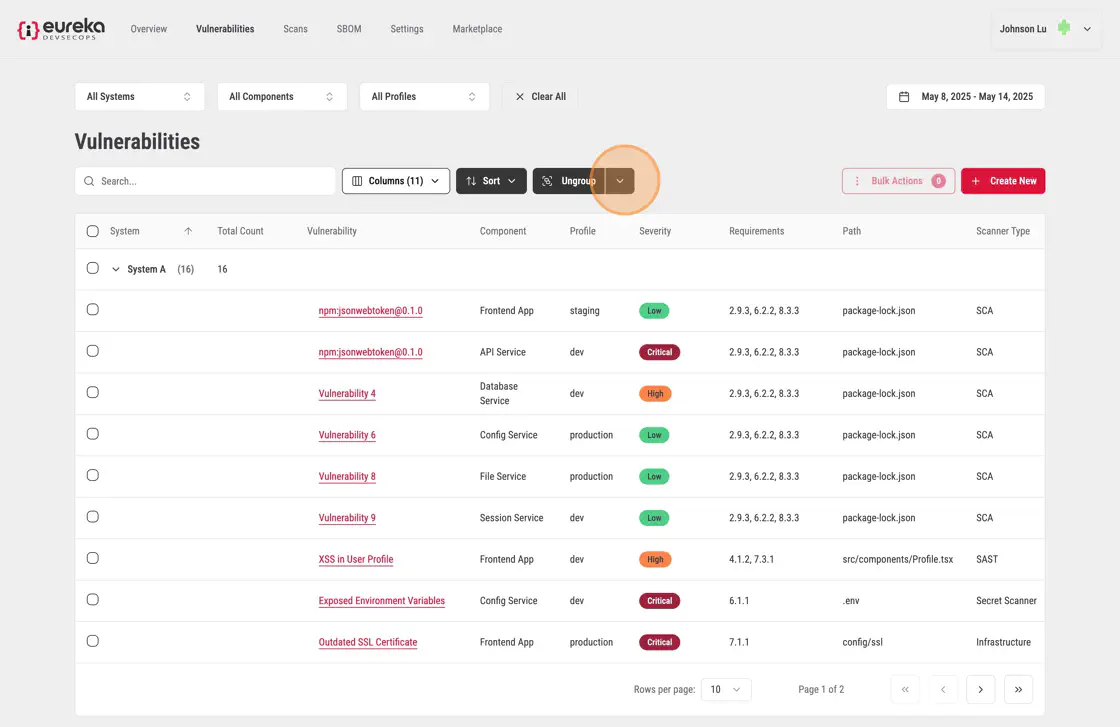
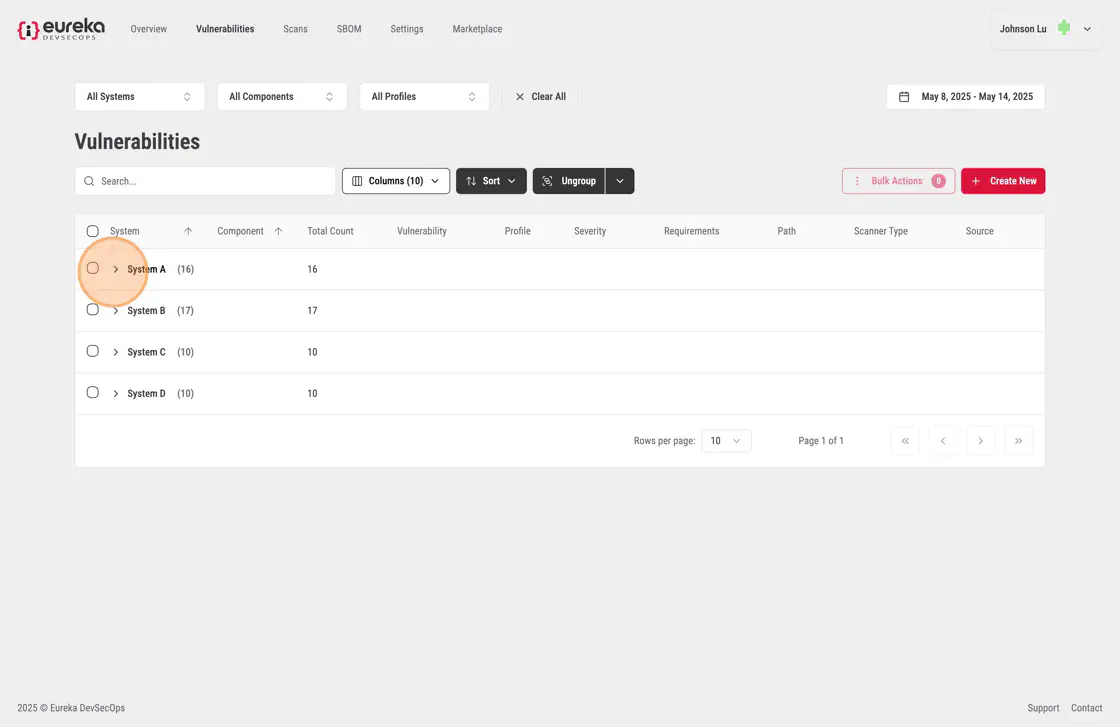
You should then see that their vulnerabiliites have been grouped by systems should they open the tab


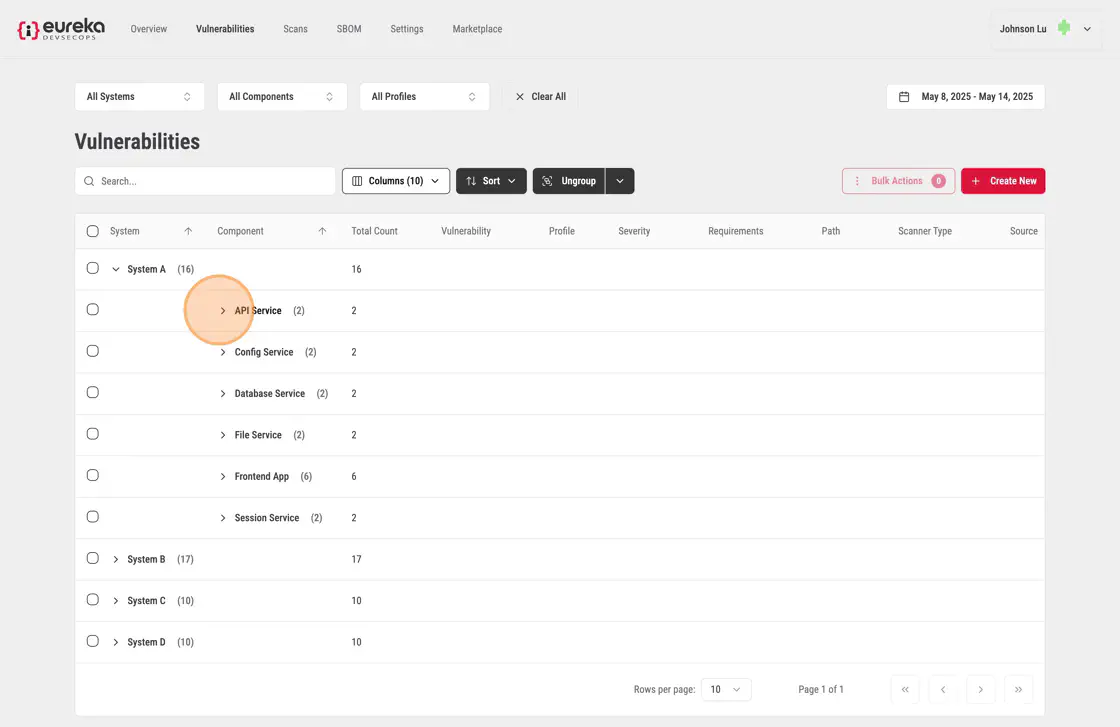
By selecting a second category, the vulnerabilities are further grouped into sub-groups
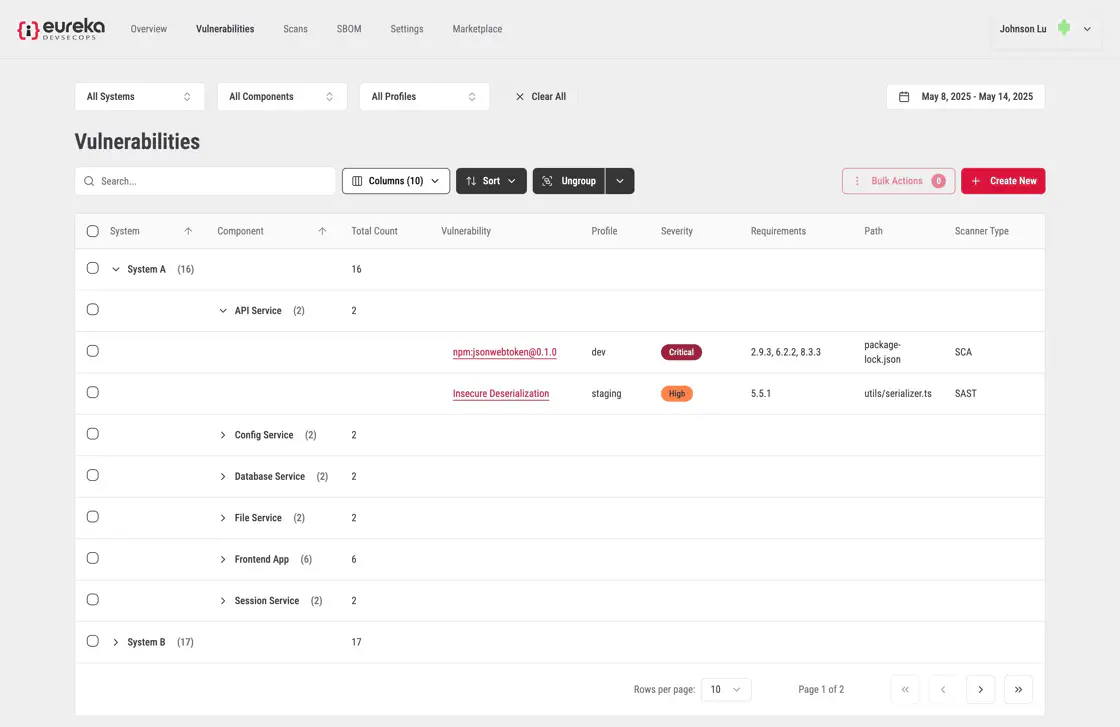
In this example, by opening up the tabs, the vulnerabilites at the end of each of these tabs are grouped by a the components within a system
To undo the grouping, simply click the Group button
To manually add a new vulnerability that was found by a user, follow these steps:
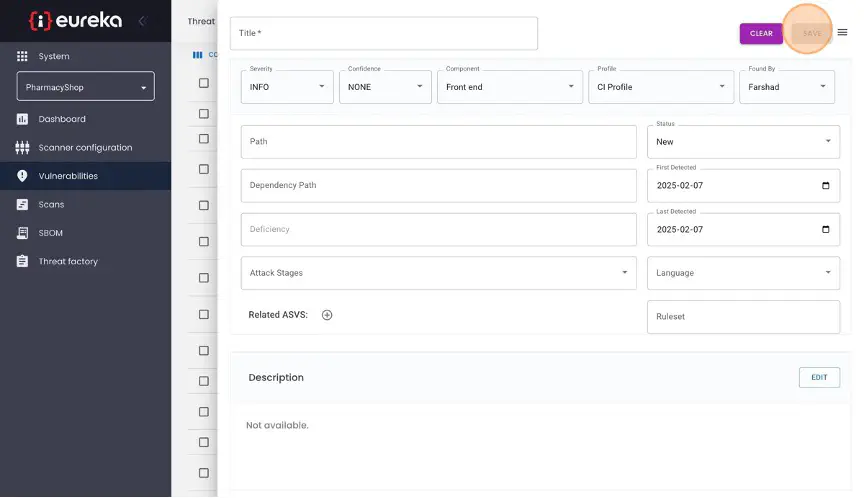
To add a vulnerability, click Create New on the top right.
Enter the title of the vulnerability, its severity level, and the level of confidence you have in this finding. Specify which component of your system the vulnerability applies to, and the profile for the environment if was found in. If the vulnerability was found by someone other than the user currently logged in to Eureka, select who found it using the “Found By” drop-down menu. If it was found in a particular file or endpoint, add this to the ”Path” field; if it was found in a particular dependency, add this to the “Dependency Path” field. The default status is set to “New”, indicating an open/active vulnerability. If the user determines that the vulnerability does not fall under this category, they can select a different status from the “Status” dropdown menu.
Enter additional information about this vulnerability, such as when it was first detected or what programming language its code is in, using the other fields. Click the “Edit” buttons to add a description or enter specific remediation steps that for fixing the issue.
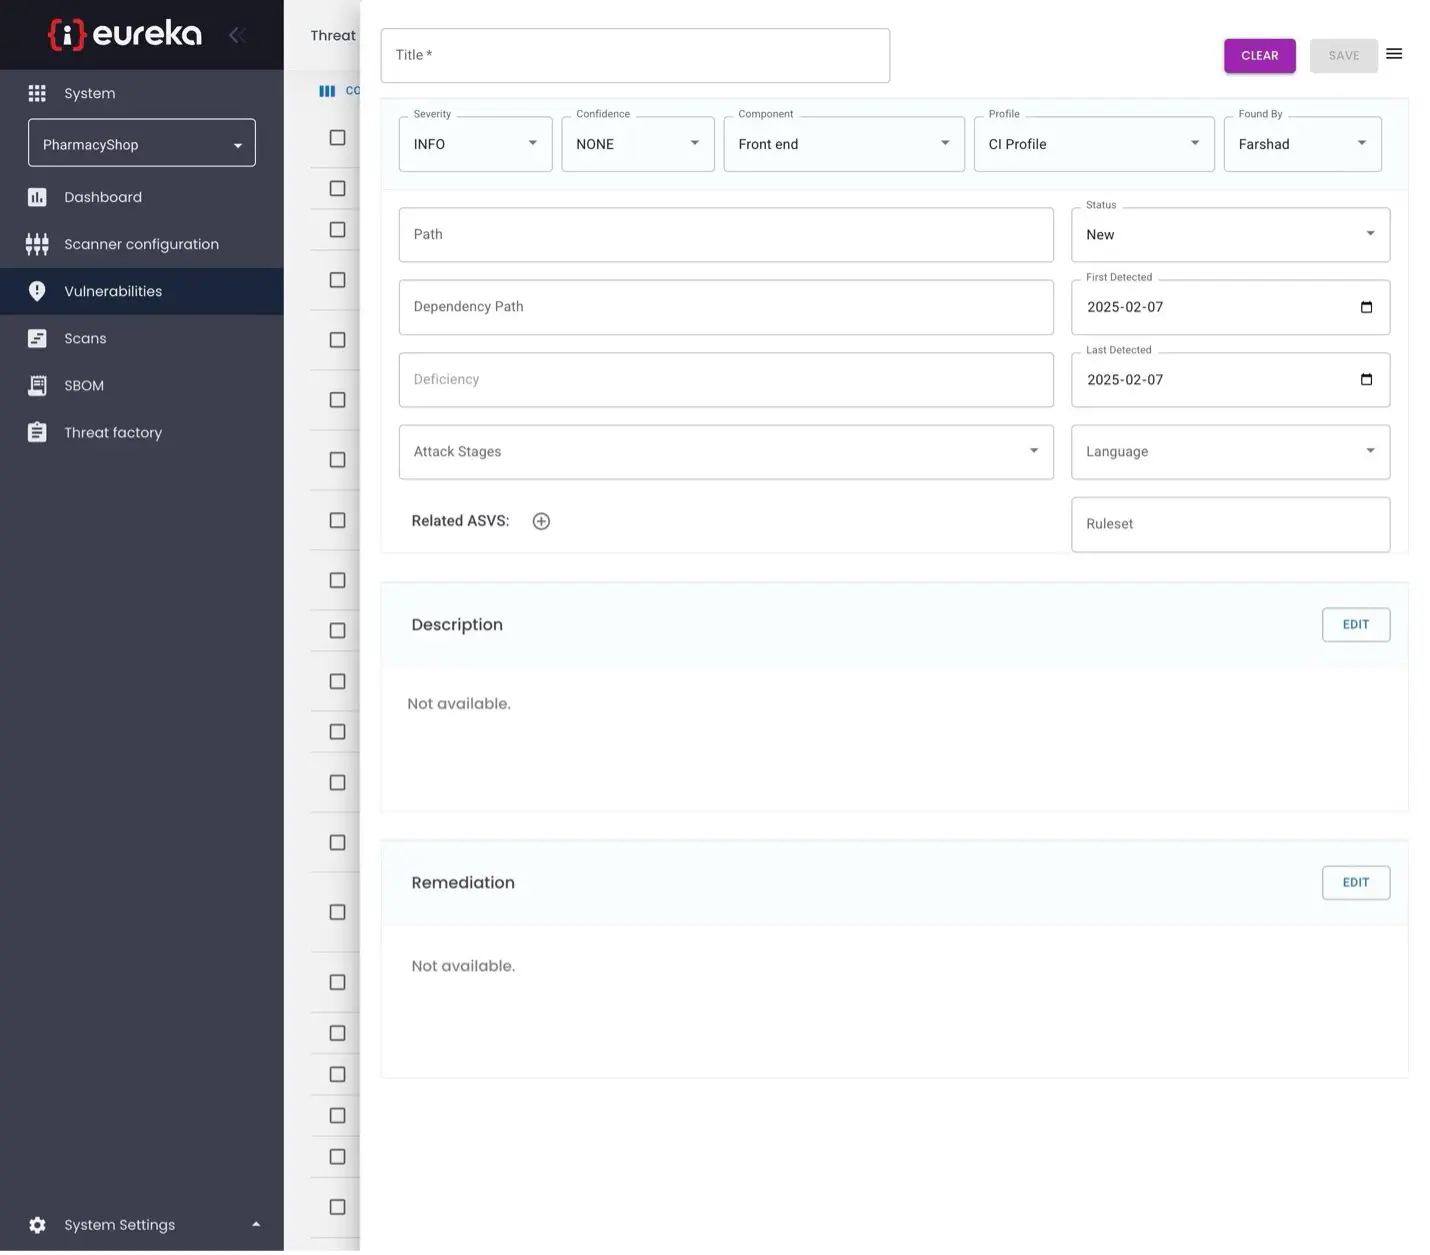
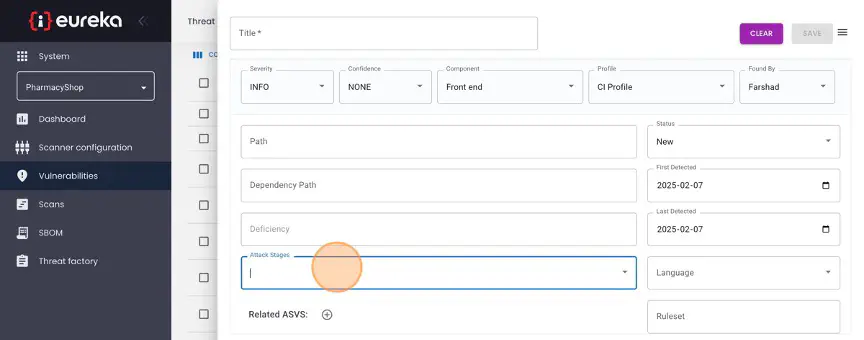
Additionally, you can relate this vulnerability to a specific stage in a multi-stage attack or threat using the “Attack Stages” drop-down menu.
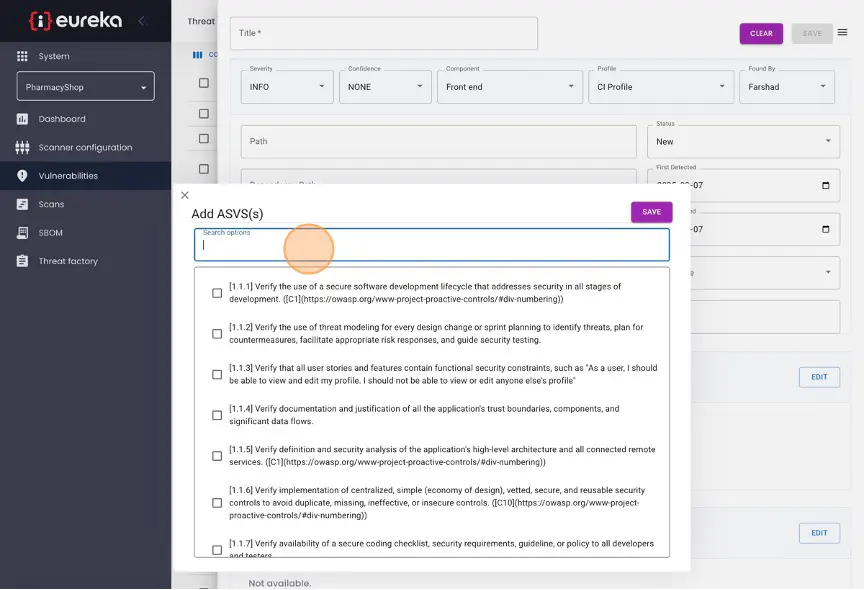
You can also select specific ASVS requirements that this vulnerability violates.
Click “Save” to save the new vulnerability.
If a vulnerability does not need to be fixed right away, you can ignore it either for a set period of time or indefinitely. When a vulnerability is ignored, it is excluded by default from the dashboard charts and Vulnerability List view in Eureka Portal. If the Eureka Agent runs with enforced scanners, it will not report a vulnerable scan status or block a pipeline because ignored vulnerabilities are detected.
To ignore a vulnerability, select the vulnerabiliites in the list which you want ignored.
Then click Bulk Actions.
Then click Ignore.
When ignoring vulnerabilities, you have two options:
In addition to ignoring or unignoring a vulnerability, you can also update its status. Depending on the vulnerability’s progress, there are several status options to choose from. When a vulnerability is first detected by the scanner, its status is set to “New” by default. You can choose from several other statuses to better reflect the vulnerability’s handling process:
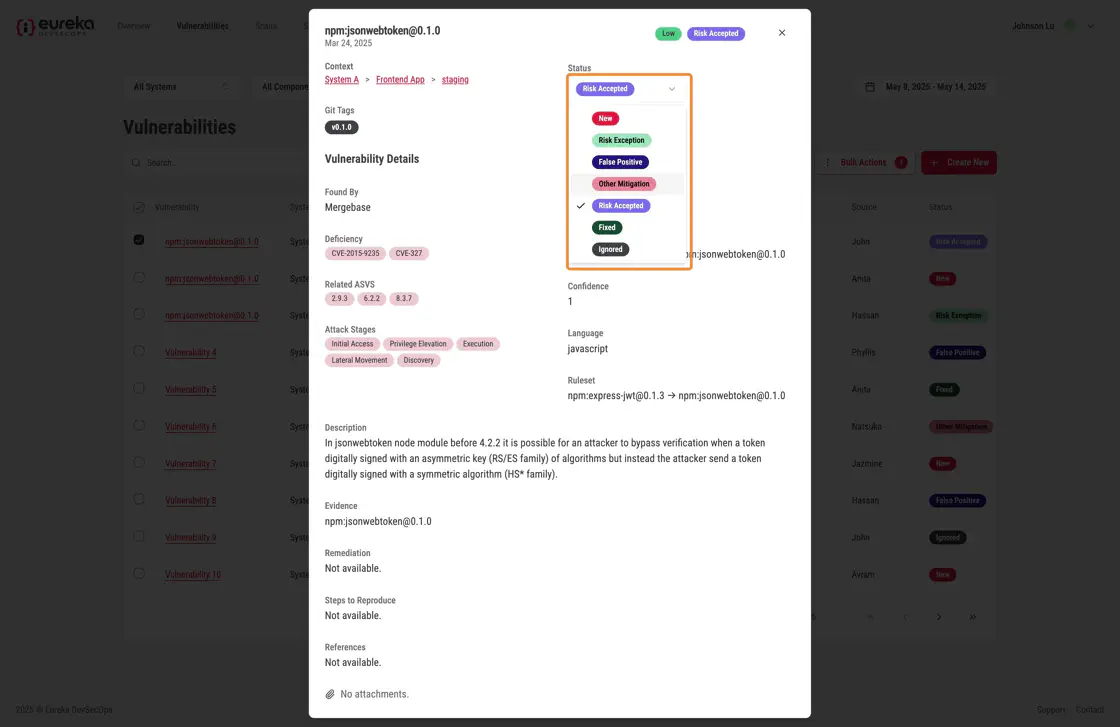
Risk Exception: A temporary exception is being requested for the risk posed by this vulnerability, but it will eventually be addressed.
False Positive: This vulnerability was reported in error and does not pose any actual risk to the system.
Other Mitigation: The issue does not need to be directly addressed, because other security controls within the system prevent it from being exploited.
Risk Accepted: Despite this issue posing some risk, your security decision makers have decided it does not need to be fixed.
Fixed: The issue has been resolved, e.g. the vulnerable dependency has been removed or the vulnerable lines of code have been changed to fix the issue. If Eureka no longer detects a vulnerability that was reported in a previous scan, the status for that vulnerability is automatically updated to “Fixed”. However, users can also manually set a vulnerability status to “Fixed” if necessary. Vulnerabilities with “Fixed” status are excluded by default from the dashboard charts and the Vulnerability List view.